The dash took some time to complete since I needed to have the dash pad restored. I sent the dash pad out to Just Dashses and recieved my quote on 9/22/17.
I took until 12/2/17 for them to complete the work and send me the invoice. By the time I received the restored dash pad it was 12/11/17. So basically it was a
3 month process and cost me $1460 including shipping, a new emblem and a new speaker grill. It was costly, but I was quite happy with what I got for my money. 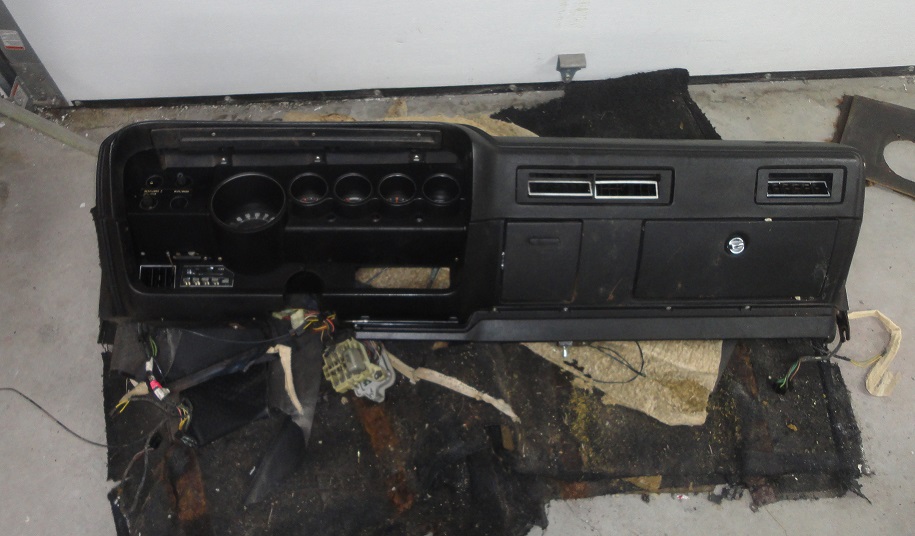
 286) I took the dash assembly out in one piece on Dec 7, 2013. It wasn't long after that I fully dismantled it and put all the pieces away in storage.
 |
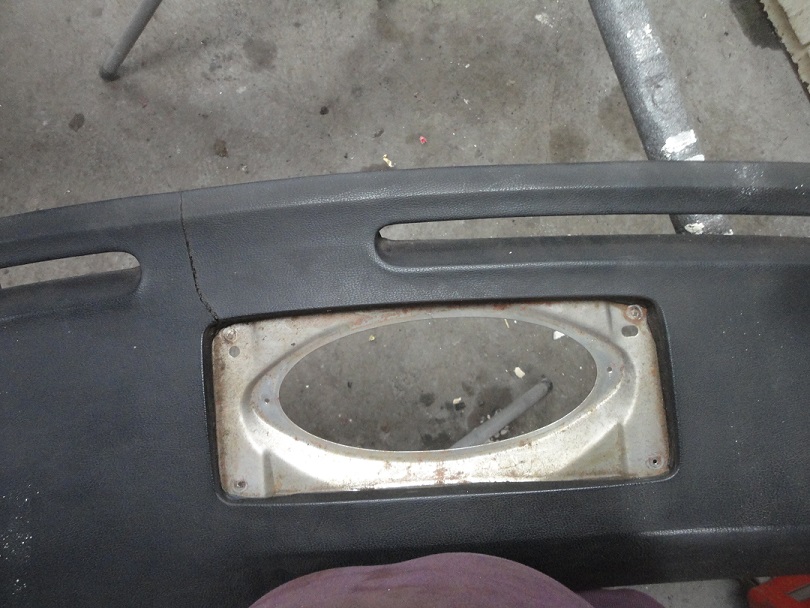 287) The dash pad was in great shape except for this typical crack by the speaker. That little crack is why I spent $1460.
 |
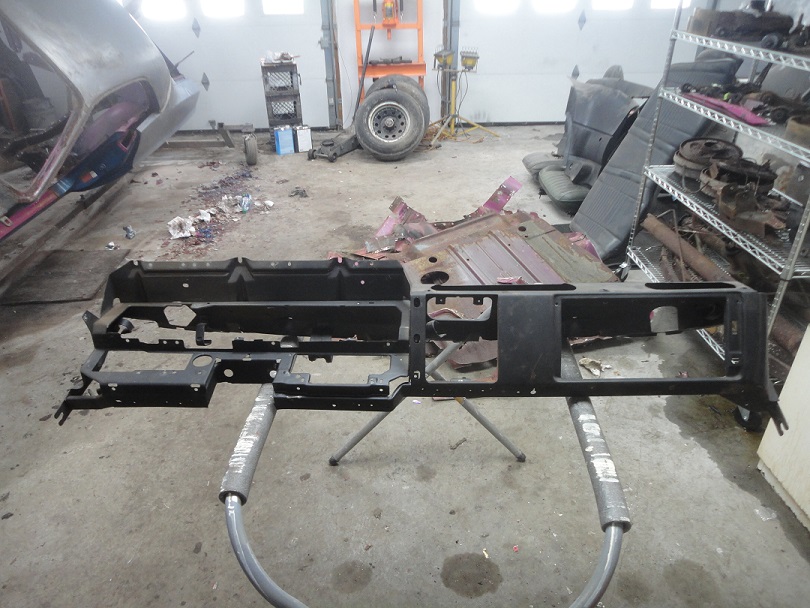
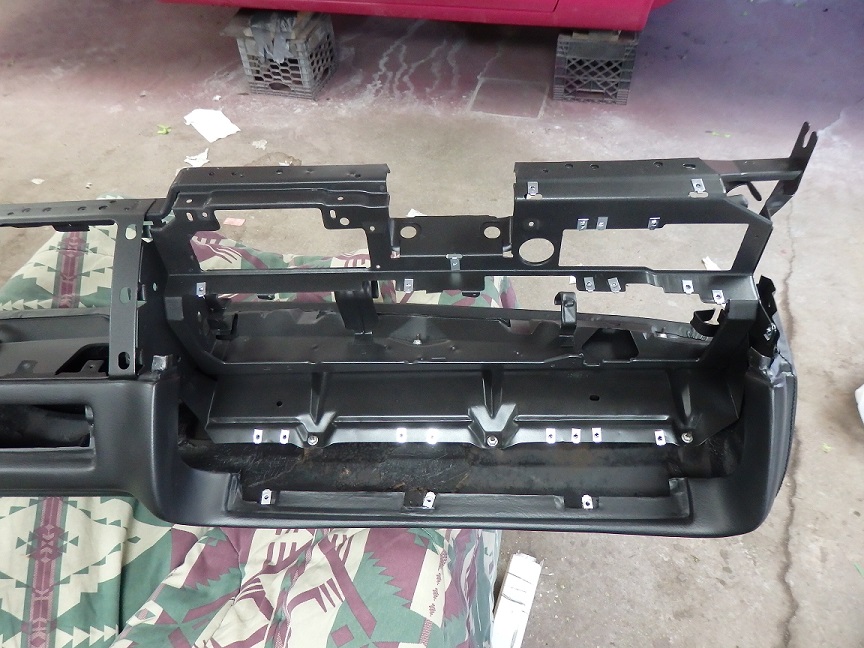
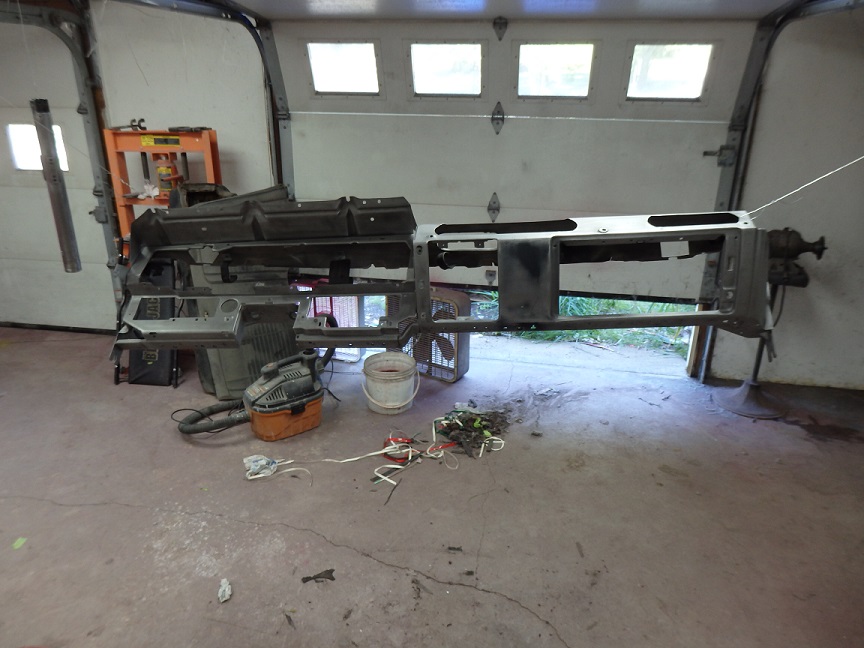 288) I eventually sandblasted, primed and painted the dash frame in the fall of 2016.
 |
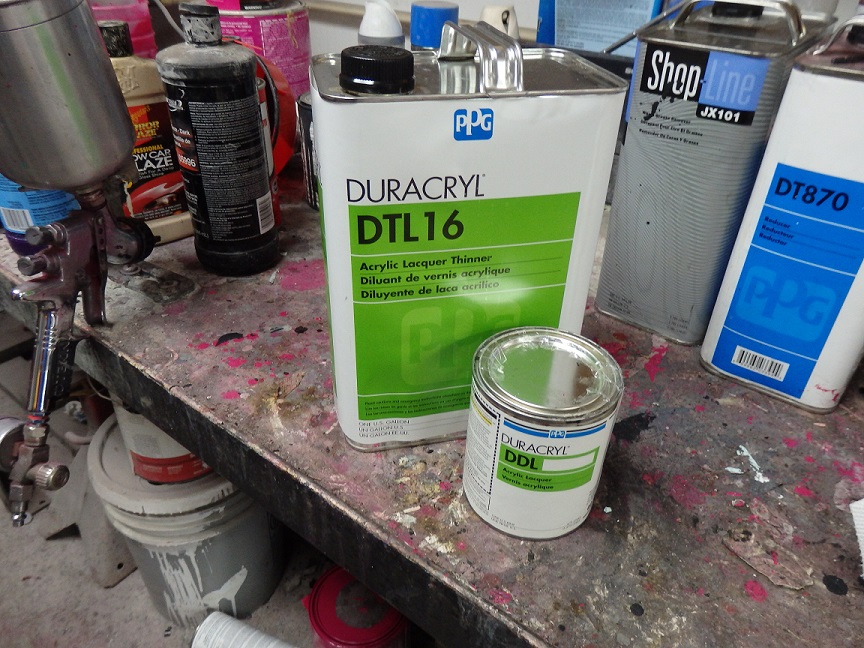 289) The paint used on the 1970 dashes was a special suede textured lacquer paint (Jewel Black, PPG 2324), which cannot be bought locally any more.
www.instrument-specialties.com still has stock materials to mix it with, but they will eventually run out. I was able to get a pint of it from
them for $99. I still needed to buy lacquer thinner, so 1 pint was more than plenty. I bet I hadn't seen a gallon of DTL16 since the 1980's!
289) The paint used on the 1970 dashes was a special suede textured lacquer paint (Jewel Black, PPG 2324), which cannot be bought locally any more.
www.instrument-specialties.com still has stock materials to mix it with, but they will eventually run out. I was able to get a pint of it from
them for $99. I still needed to buy lacquer thinner, so 1 pint was more than plenty. I bet I hadn't seen a gallon of DTL16 since the 1980's! |
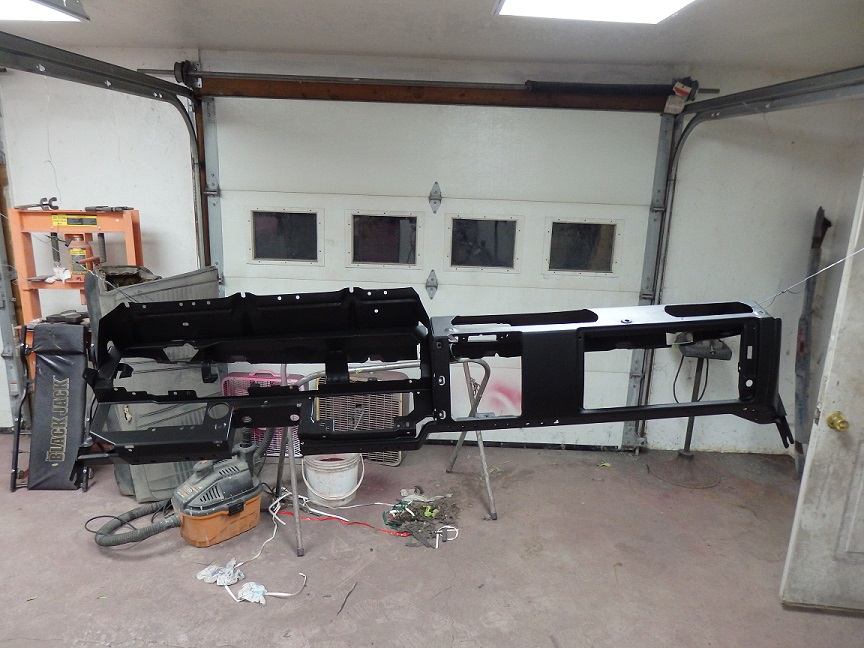
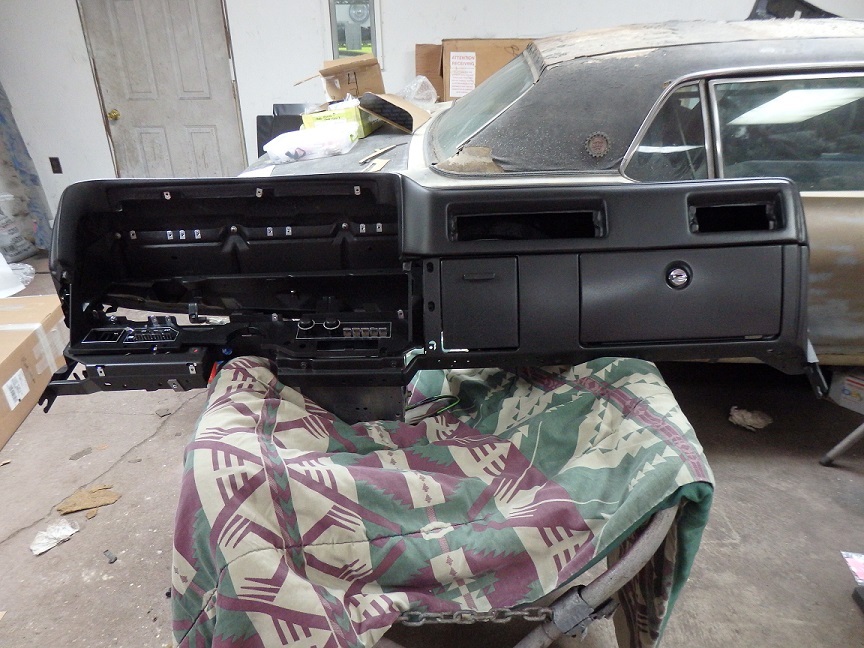
 290) I sprayed the paint in a conventional gun. Though it took a little practice to get the right texture and not have it look dry. The dash frame, ash tray door,
glovebox door and steering column pieces were all originally painted with suede paint in 1970.
290) I sprayed the paint in a conventional gun. Though it took a little practice to get the right texture and not have it look dry. The dash frame, ash tray door,
glovebox door and steering column pieces were all originally painted with suede paint in 1970. |
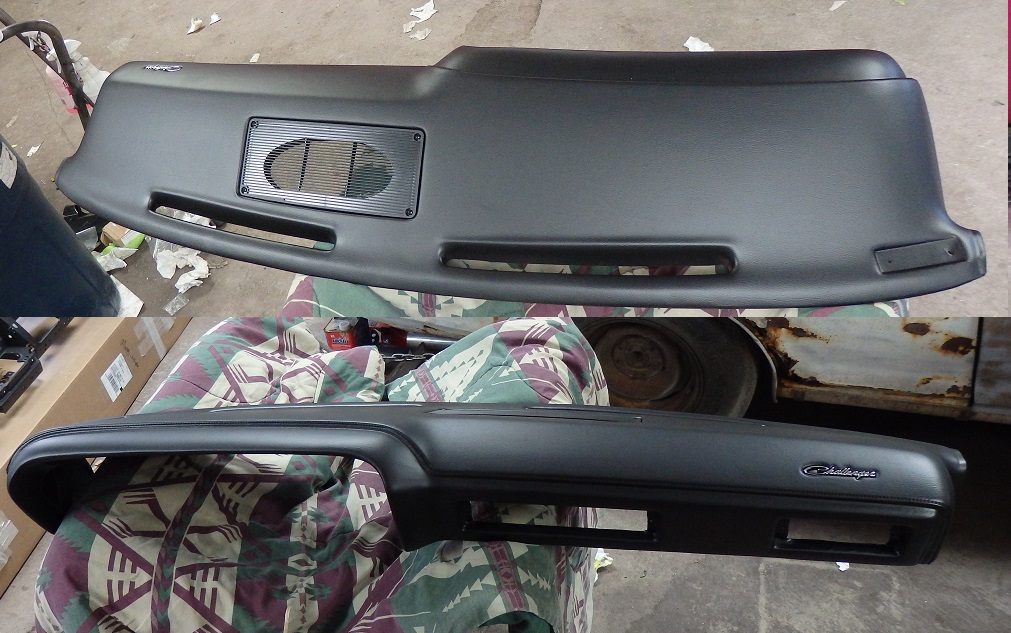 291) The dash pad looked awesome when it came back. I had no complaints. One import thing to note is that the VIN tag had to be removed from the pad before it was sent out, since the
pad could not be restored without removing it. Personally I think it was a very dumb thing for Chrysler to have riveted the VIN to the "removable" dash pad and not the car. You have to remove the VIN
to restore or replace your dashpad. Eventually I restored the tag and reinstalled it with NOS reivets from ECS Automotive Concepts. It should be noted that the only reason I can get away with this
is because it is legal in Vermont to remove a VIN tag for purposes of restoration.
291) The dash pad looked awesome when it came back. I had no complaints. One import thing to note is that the VIN tag had to be removed from the pad before it was sent out, since the
pad could not be restored without removing it. Personally I think it was a very dumb thing for Chrysler to have riveted the VIN to the "removable" dash pad and not the car. You have to remove the VIN
to restore or replace your dashpad. Eventually I restored the tag and reinstalled it with NOS reivets from ECS Automotive Concepts. It should be noted that the only reason I can get away with this
is because it is legal in Vermont to remove a VIN tag for purposes of restoration. |
 292) I went a little overboard on this car and had all of the dash hardware replated before I started assembling it.
 |
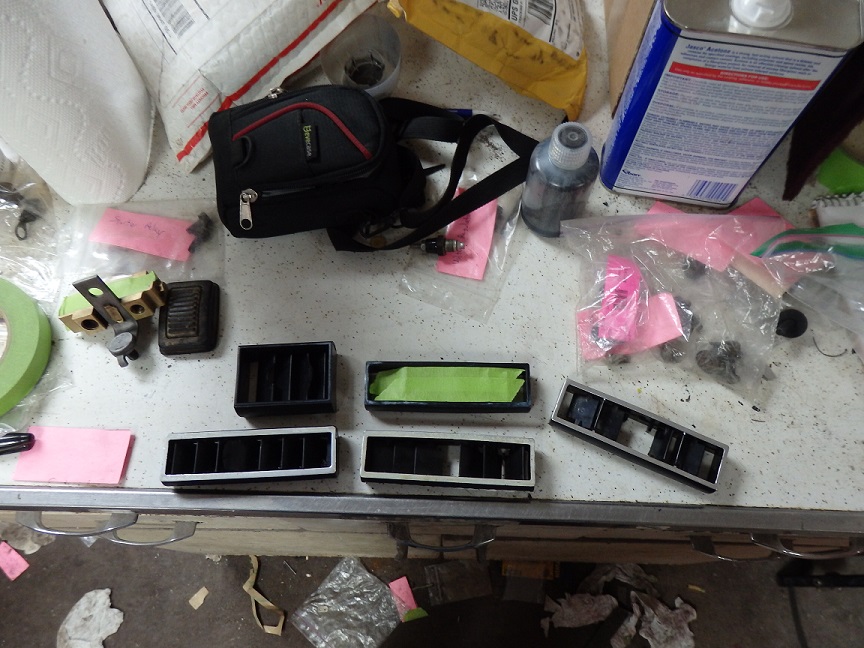
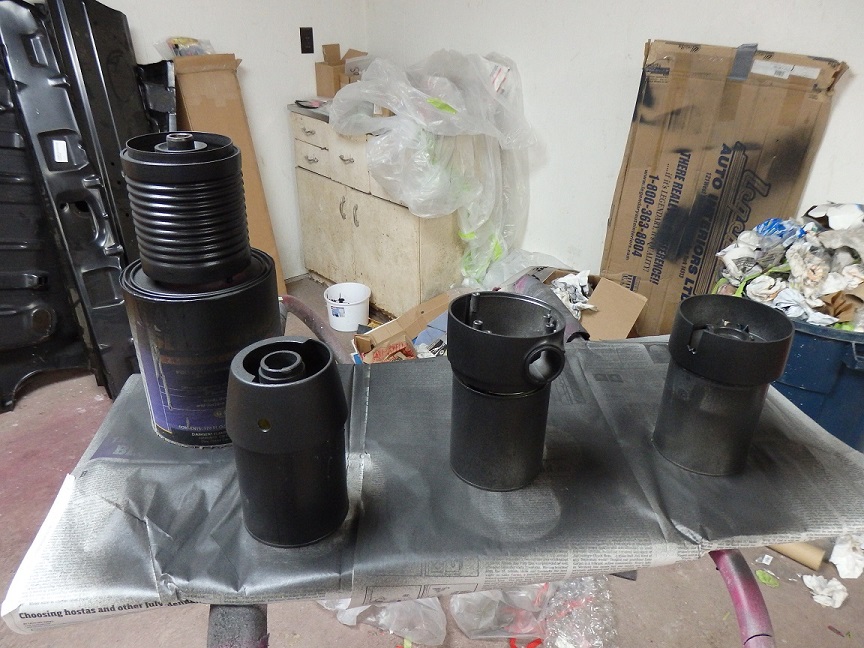
 293) The vents needed restoration before installing. A couple flaps were broken, but I was able to fix them by replacing the broken plastic pins with metal pins. This was done by drilling
small holes where the broken pins were and glueing in heads cut off pins once the vents were reassembled.
293) The vents needed restoration before installing. A couple flaps were broken, but I was able to fix them by replacing the broken plastic pins with metal pins. This was done by drilling
small holes where the broken pins were and glueing in heads cut off pins once the vents were reassembled.The housing for the passenger side vent had a broken mount for the vent rod (shown here). This is a typical problem for this 1970-71 part. I was lucky enough to find a new one on ebay for $50. |
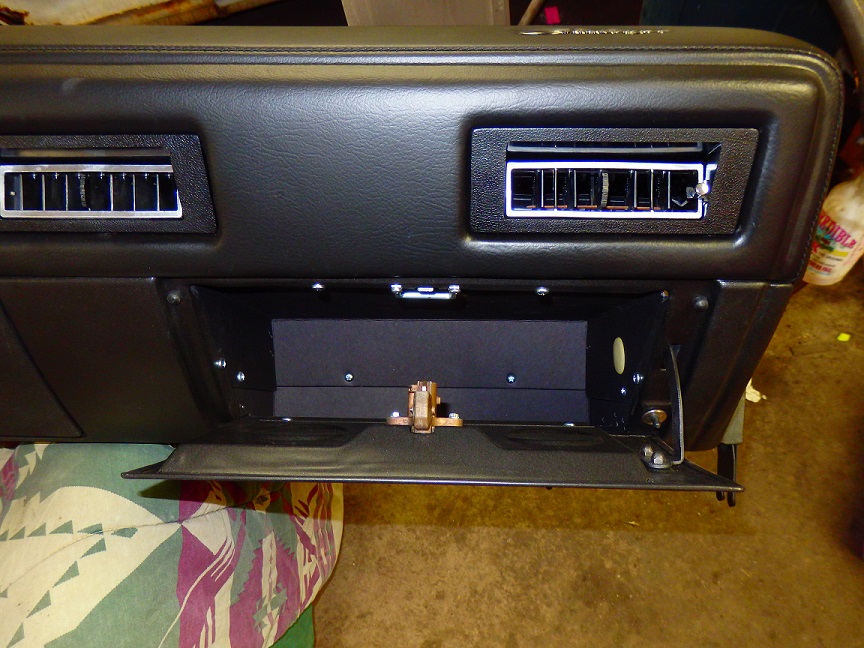 294) After detailing with chrome paint the vents were installed in the dash.
 |
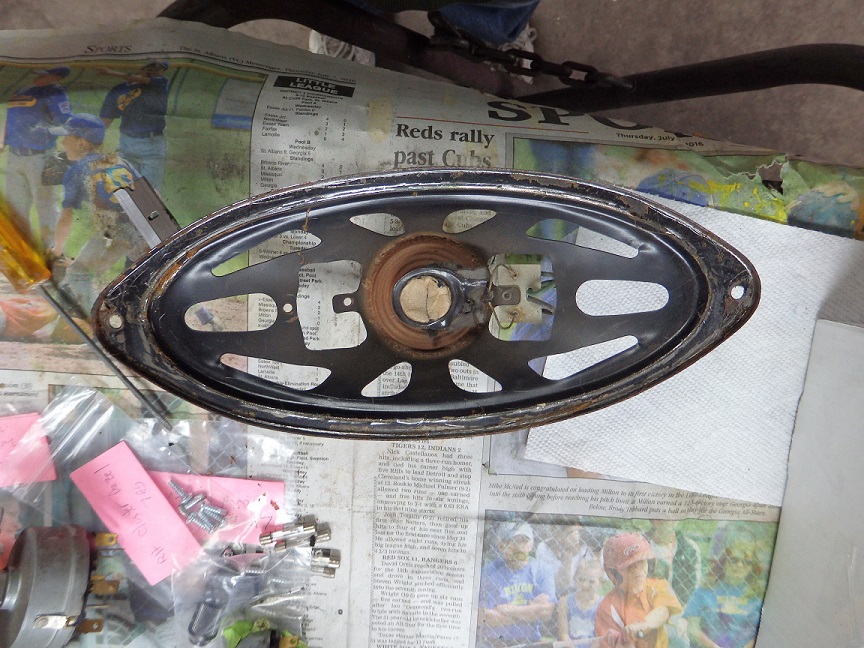
 295) The dash speaker was a problem since it had a tare in the cone. They don't make original looking or fitting speakers for this dash and I couldn't locate a good used one.
So I decided to recone the speaker myself. I was able to get a kit from The Speaker Exchange (www.reconingspeakers.com) in Tampa, FL. They put together a kit specific to
the speaker part number that I gave them. I paid $36 for the kit including shipping. If oyu choose to do the same make sure you ask for the adhesives.
295) The dash speaker was a problem since it had a tare in the cone. They don't make original looking or fitting speakers for this dash and I couldn't locate a good used one.
So I decided to recone the speaker myself. I was able to get a kit from The Speaker Exchange (www.reconingspeakers.com) in Tampa, FL. They put together a kit specific to
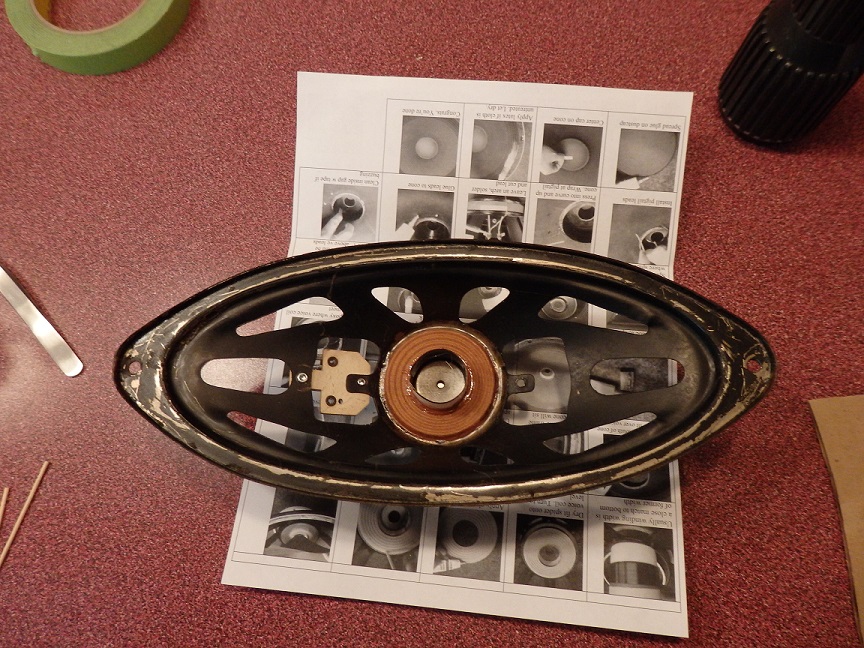
the speaker part number that I gave them. I paid $36 for the kit including shipping. If oyu choose to do the same make sure you ask for the adhesives.Reconing was quite simple. The first picture shows the original speaker with the cone removed. The second pictures shows it while the glue was curing after I replaced the voice coil and spider. All that remained was to glue in the cone and cap, followed by the thin black cotton cloth for protection. |
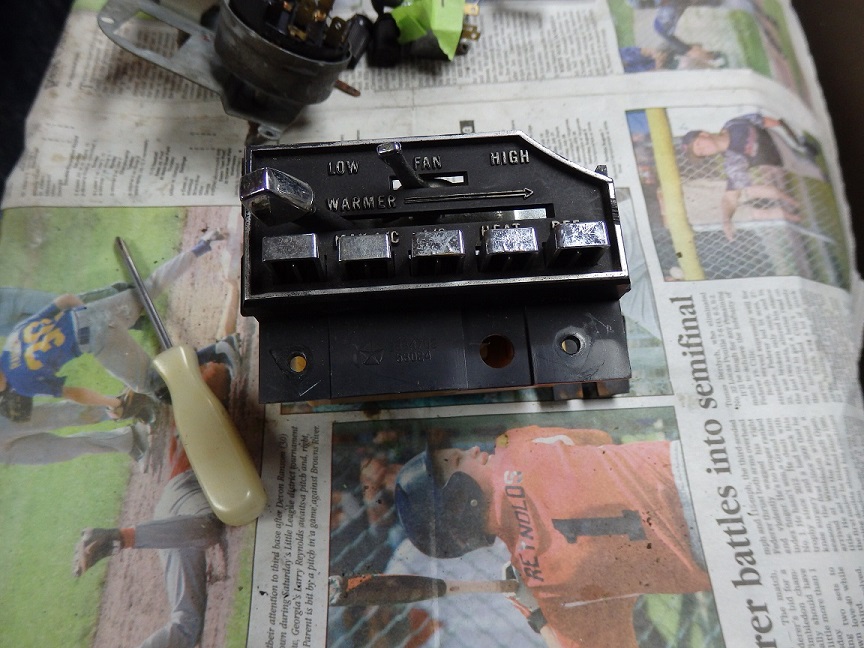
 296) The climate controls and accessory controls were in great shape. They just needed freshening up.
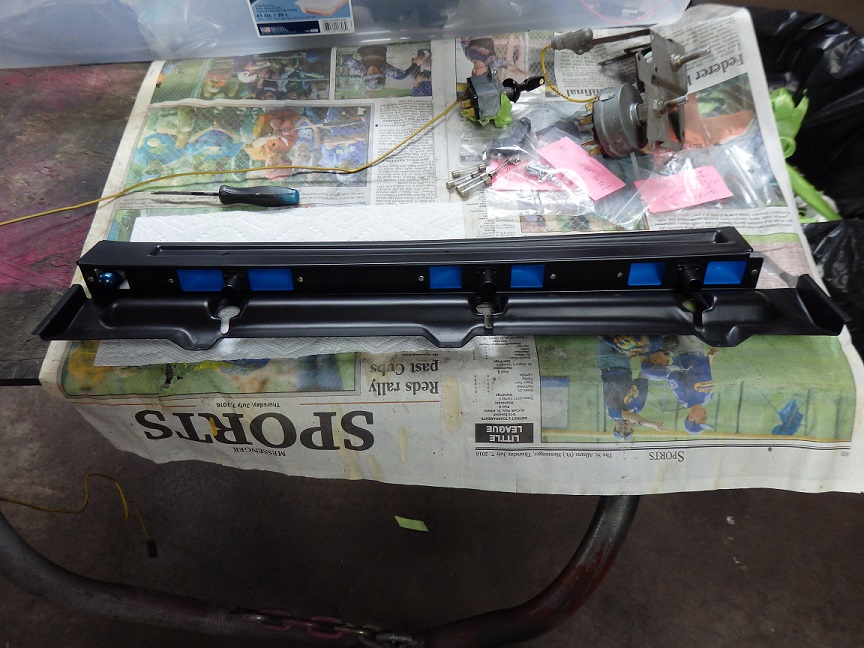
The light panel over the gauges had to come a part to be cleaned and painted. It was held together with special rivets, which get installed with a special tool. I was able to buy the rivets and the special tool from www.RivetsOnline.com. The panel itself was painted with SEMS Trim Black paint. No suede paint ever went on these panels. |
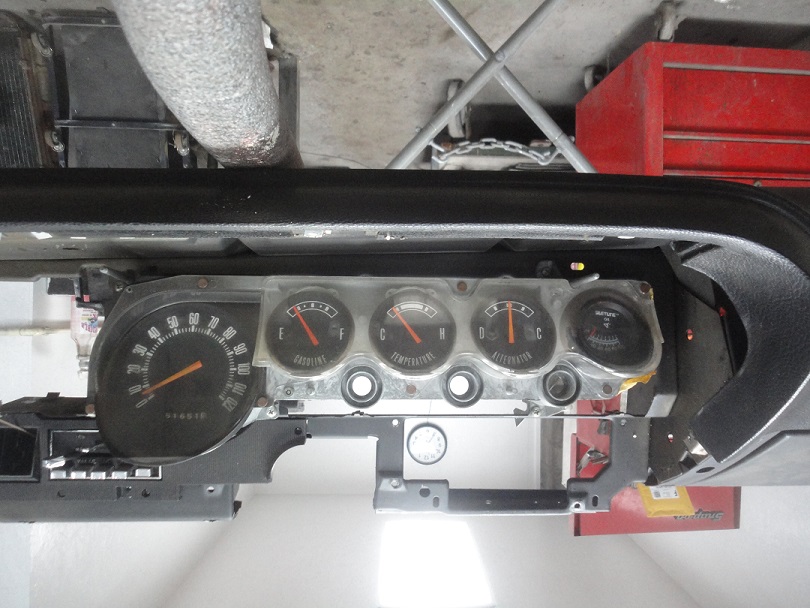
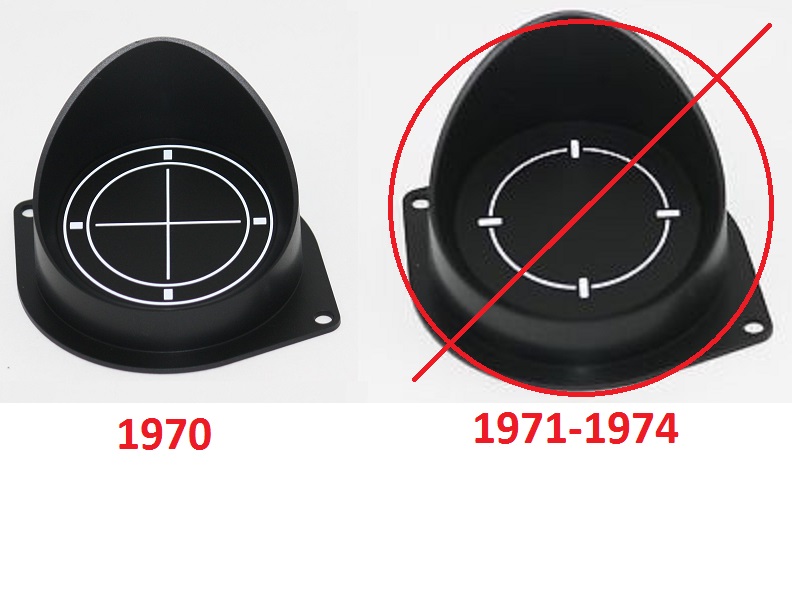 297) The cluster was in great shape, but someone had drilled out the clock delete panel and installed an oil pressure gauge. I eventaully found a good used one. It should be noted that
the graphic on a 1970 is different then the 71-74 Challengers.
297) The cluster was in great shape, but someone had drilled out the clock delete panel and installed an oil pressure gauge. I eventaully found a good used one. It should be noted that
the graphic on a 1970 is different then the 71-74 Challengers. |
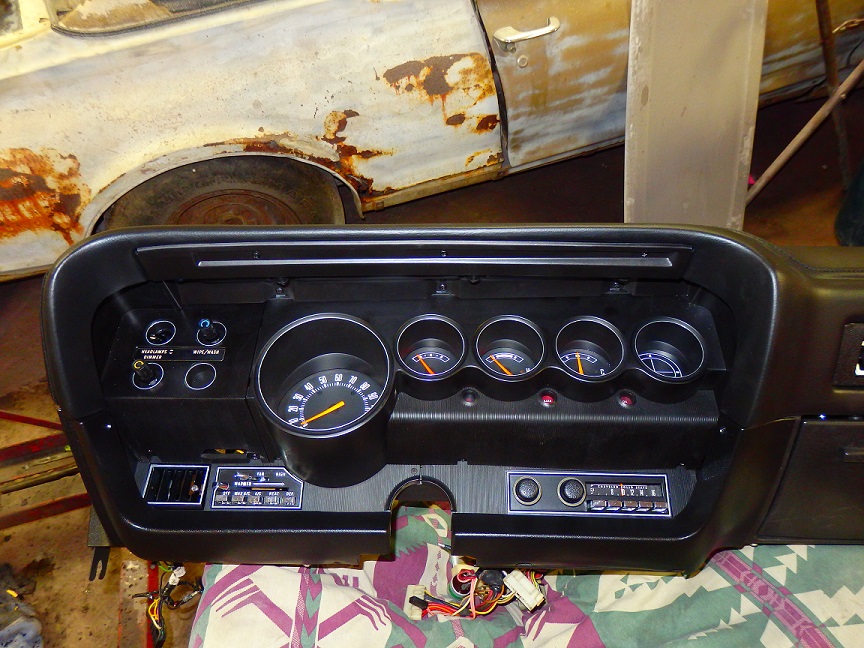 298) Here's the instrument cluster all restored and mounted into the dash. Besides a little detailing with a small paint brush the only thing that was repainted, was the L-shaped lower surrounds
which got a coat of SEMS trim black.
298) Here's the instrument cluster all restored and mounted into the dash. Besides a little detailing with a small paint brush the only thing that was repainted, was the L-shaped lower surrounds
which got a coat of SEMS trim black. |
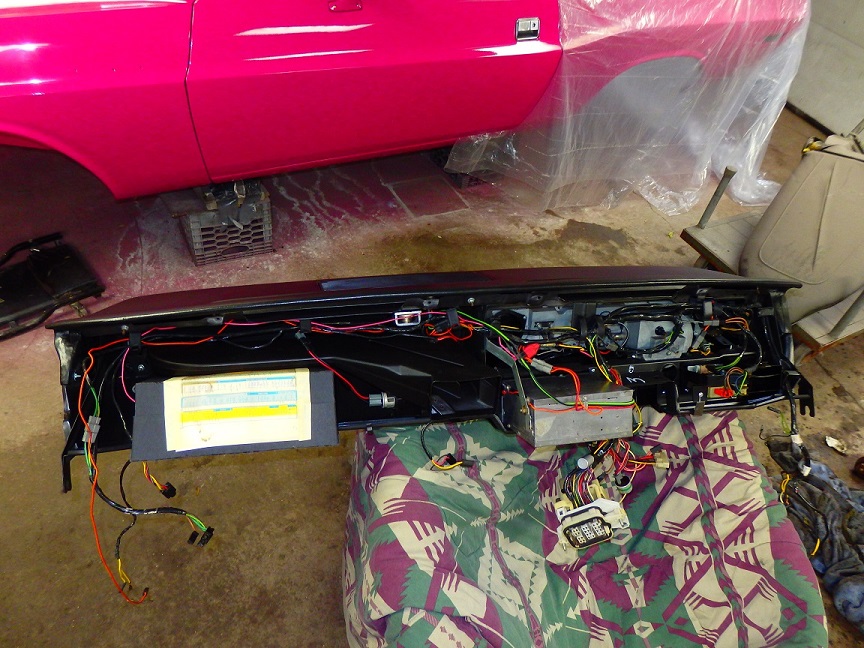 299) With the front all together, I cleaned up and installed the wiring harness. The final touch was when I made a color copy of the build sheet and taped it to the glove box
like the factory originally did. I will probably do the same with front and rear seats.
299) With the front all together, I cleaned up and installed the wiring harness. The final touch was when I made a color copy of the build sheet and taped it to the glove box
like the factory originally did. I will probably do the same with front and rear seats. |
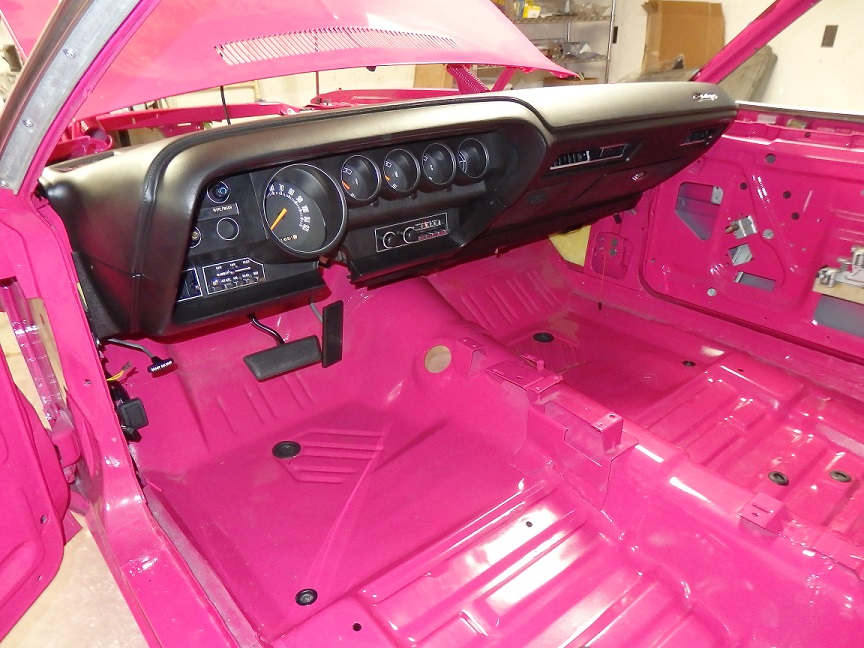 300) Installing the dash in the car is ridiculously easy. There are two long bolts that are loosely installed at the kickpanels. You rest the U-shaped knotches that are at the bottom of the dash
onto the two bolts and swing the dash assembly forward into place. You then bolt the dash at the defroster ducks and then tighten the two long bolts down. Then you make the cable connections.
Took me about 15 mintutes.
300) Installing the dash in the car is ridiculously easy. There are two long bolts that are loosely installed at the kickpanels. You rest the U-shaped knotches that are at the bottom of the dash
onto the two bolts and swing the dash assembly forward into place. You then bolt the dash at the defroster ducks and then tighten the two long bolts down. Then you make the cable connections.
Took me about 15 mintutes. |