|
Painting was the next phase of the project. The first thing to get painted was the undercarriage. This involved putting the car back on the rotisserie. The doors, fenders, trunklid, hood and valance panels were all pulled to do this. With the shell back on the rotisserie, the first thing I did was to sand the interior, trunk, undercarriage and engine compartment. This was mostly done with an orbital sander and a lot of 3M scuff pads.
|
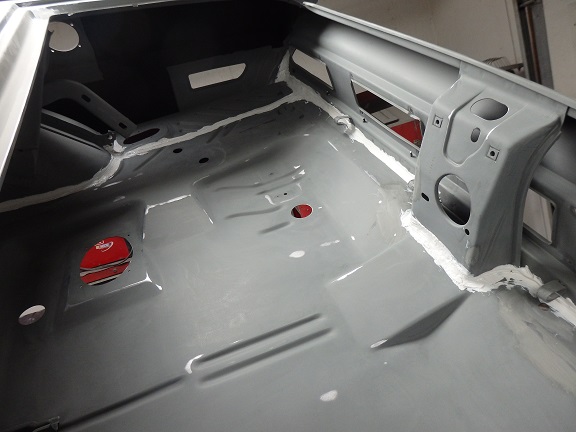
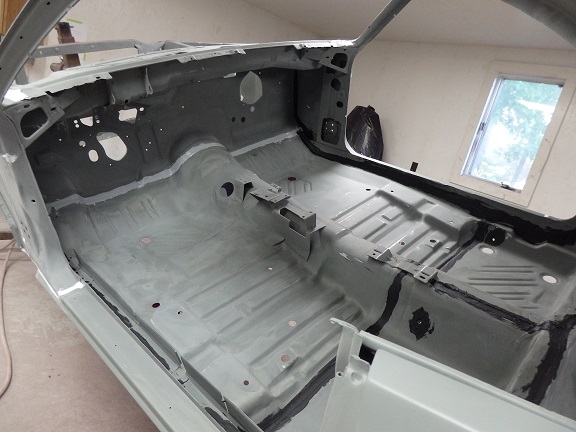 222) Then came the seam sealing and undercoating. I tried to replicate what the factory did as much as possible. The seam at the bottom of the firewall was originally white. I used SEMS 29362 White Seam Sealer. It looks really close to the original and paint brush marks stays sharp even after the sealer dries.
The rest of the interior floor was sealed with Black Jack Neoprene Super Flash Cement, which I bought at Lowes. It replicates the original factory sealer very closely and is easy to work with. I used 4 tubes to do the entire car. |
 223) The black seam sealer stops at the front of the trunk pan under the package tray. The steel floor pan plugs were actually installed prior to the primer dip and painting process. On the inside of the car they were sealed with black seamsealer.
 |
 224) The seams in the trunk were loaded with SEMS 29362 White Seam Sealer, just like the factory. If it looks neat, you are doing it wrong. Using white seam sealer in the trunk was started in 1960 when the wife of Chrysler President Lynn Townsend found that her luggage once was marred by the black sealer.
The factory originally sprayed a thick layer of sound deadener on the inside of the quarter panels before they were welded in. I had no luxury of this since I did not install full quarter panels. For the correct factory look I covered the sidemarker holes and gas filler hole with cardboard and used a special mix of undercoating sold by RestoRick. It replicates the factory undercoating very well. To spray it I used a cheap Chinese knock-off of a rocker Schutz gun. I think it came out great. |
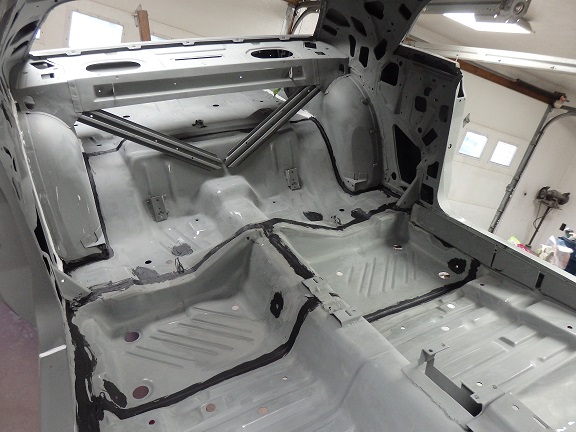
 225) Here is a view of the driver's side.
 |
 226) The seam along the inside of the tail panel was originally seam sealed was well. Even the base of the trunk latch support was sealed.
In this picture you may notice the screws coming up through the floor at the base of the tail panel. These are the screws that hold the rear bumper upper filler panel in place. The filler panel was originally installed prior to paint and was even seam sealed from the outside. I've seen many restored cars where the filler panel was installed later. This would not be correct since the screws are visible and they should have seam sealer on them and should be painted body color. |
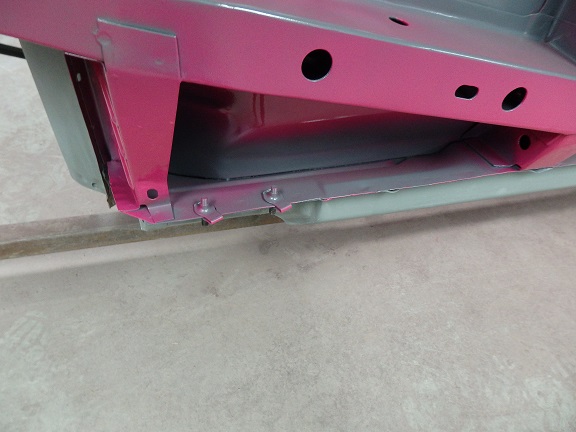
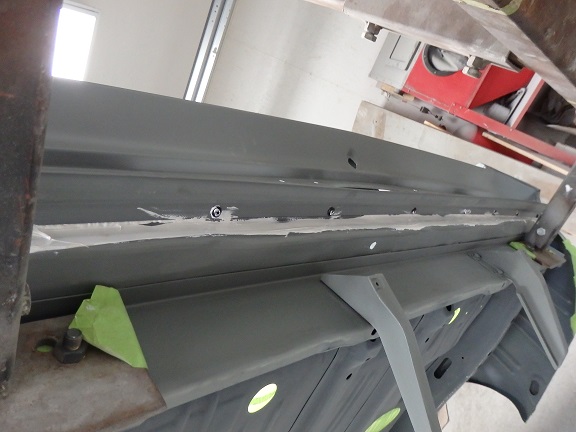 227) Here is an underside shot of the rear bumper upper filler panel screwed in place. Most of the seam sealer shown in this picture was applied to seal the rear panel seam.
Also noticable is the vertical rear valance brackets. Those too were installed prior to paint. |
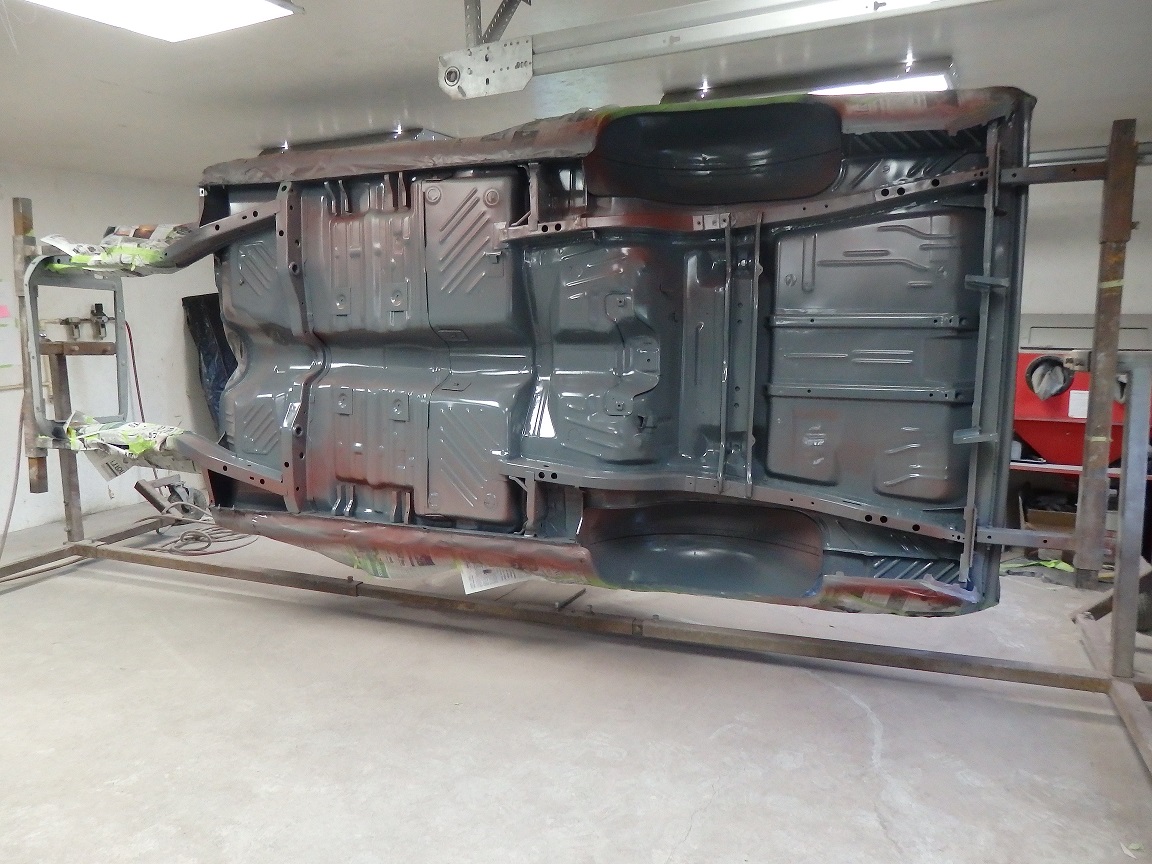
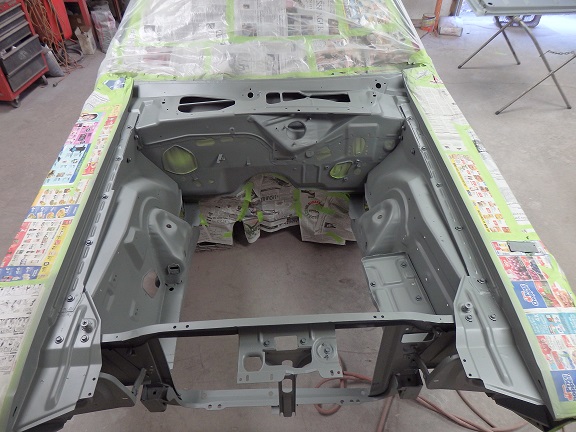
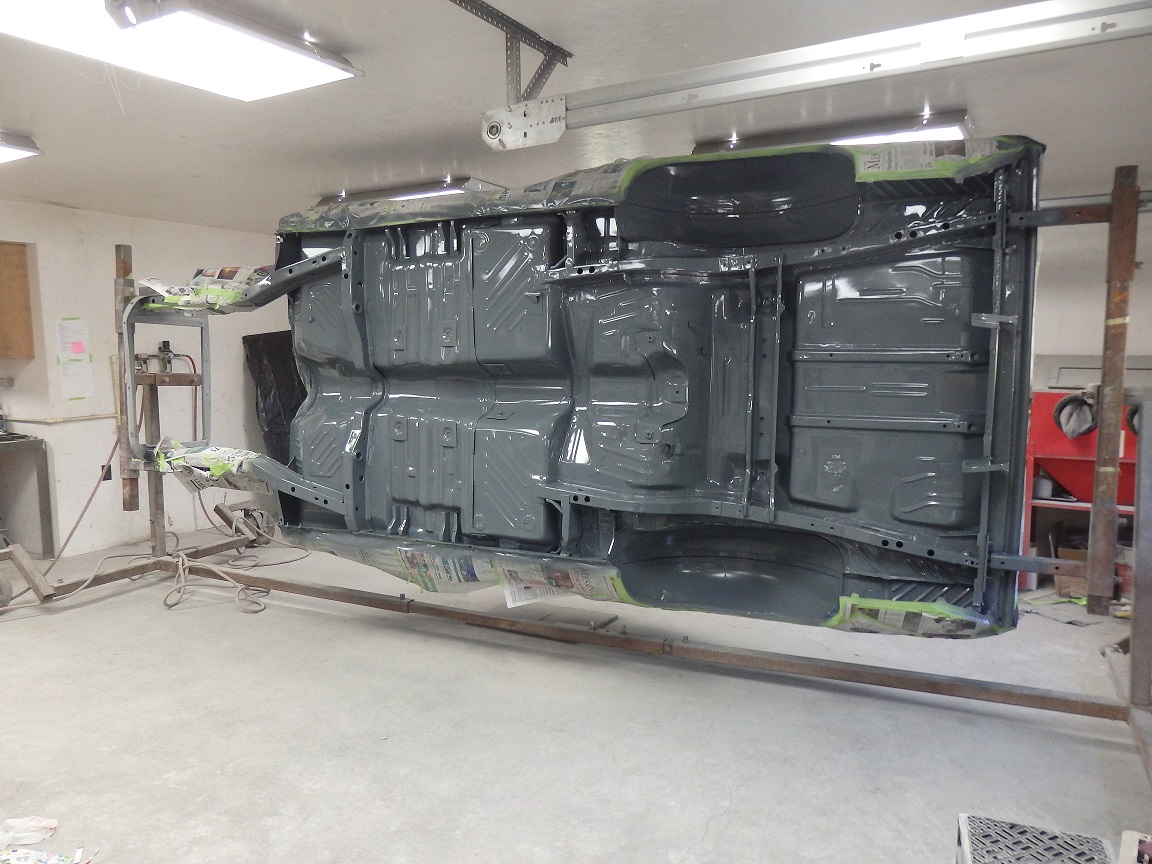 228) And at last there was paint! Originally the factory would have dipped the car half way up its side in a vat of water soluable gray primer (dip gray). The primer on the outside of the car was then hosed off before the primer was baked on. In the end the primer is only visibly from the undercarriage.
To replicate the factory look I painted the undercarriage with paint that was specially formulated by RestoRick to match the original dip gray. |
 229) The next thing the factory did was to coat the outside panels with red oxide primer. This was baked on and then the outside panels were coated with a light gray primer prior to painting. To replicate this I shot DP74LF along the masked rocker panels to simuldate the overspray. Then I shot some tinted DP40LF to match the factory gray.
In this picture you can see what it looked like after the light gray overpray was applied. |
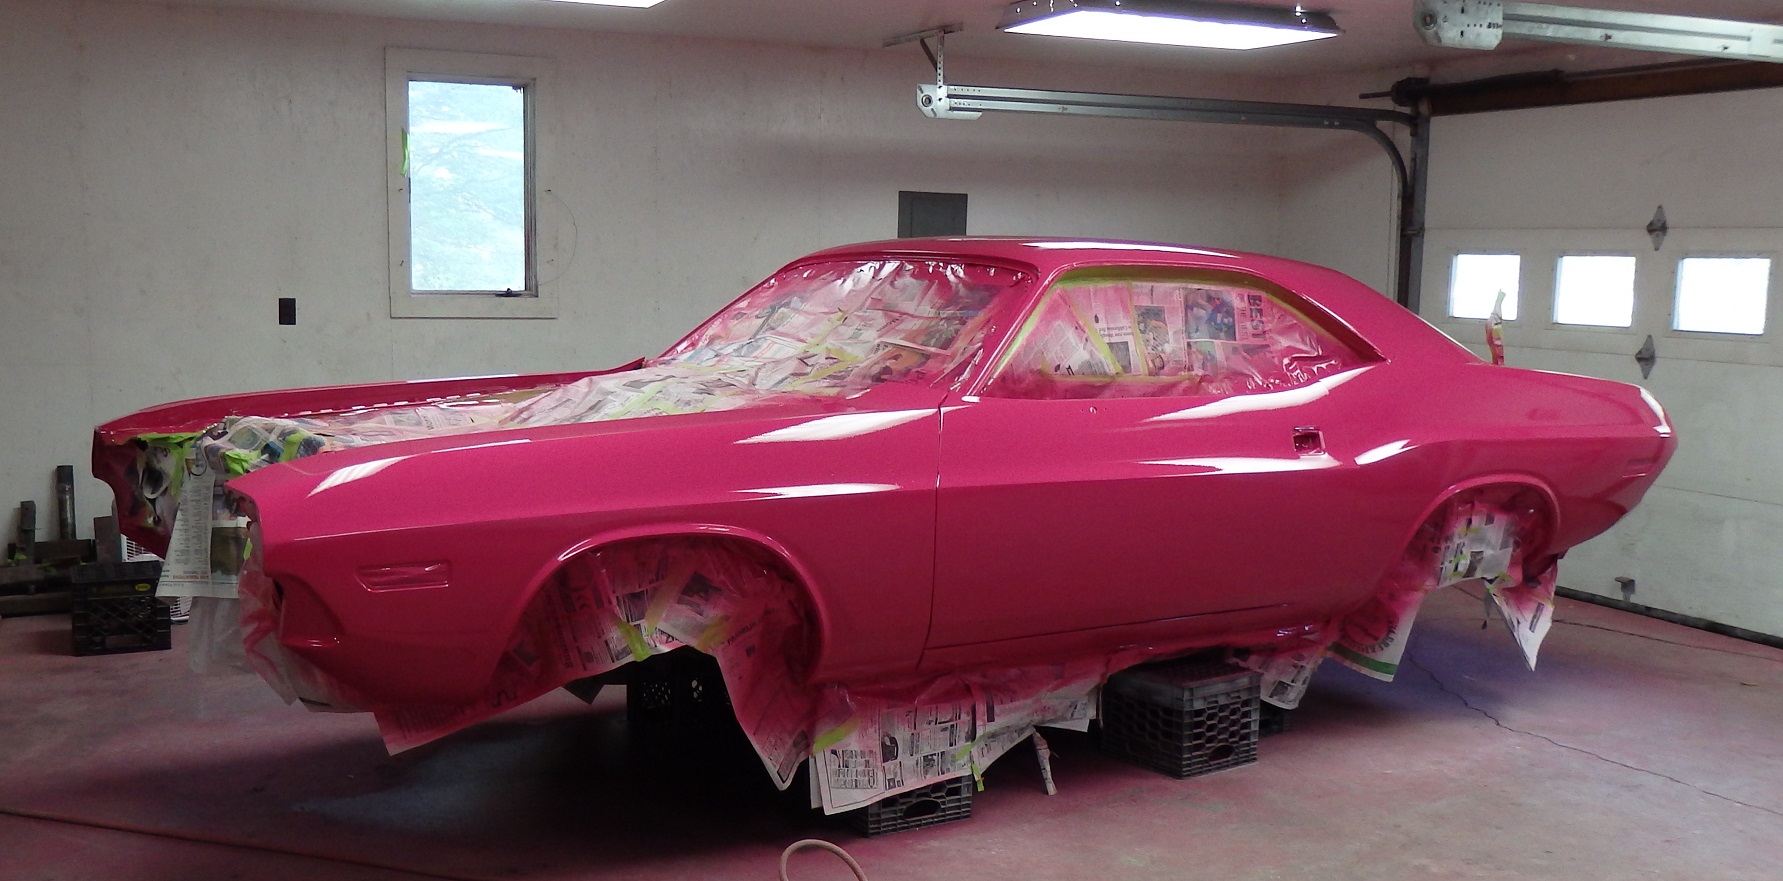
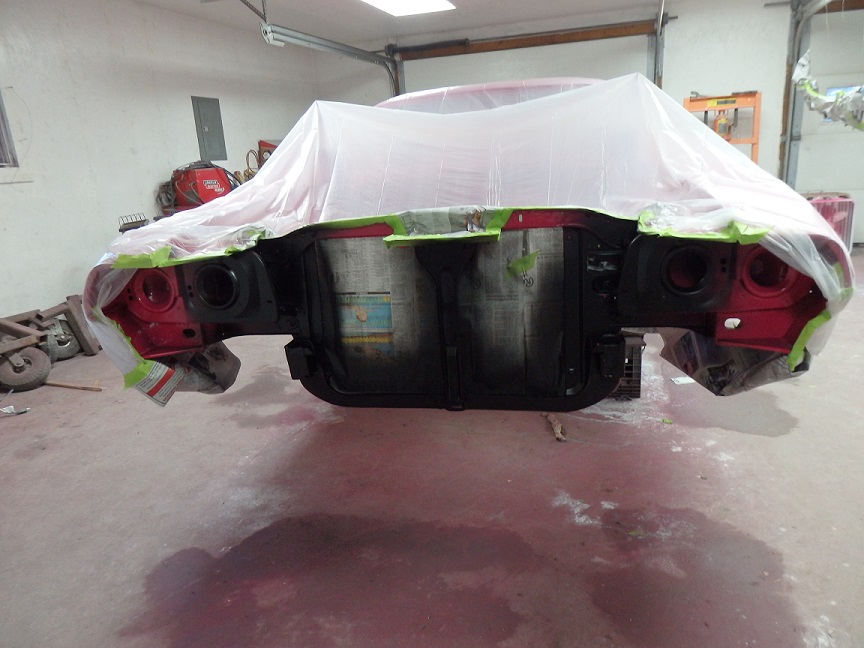
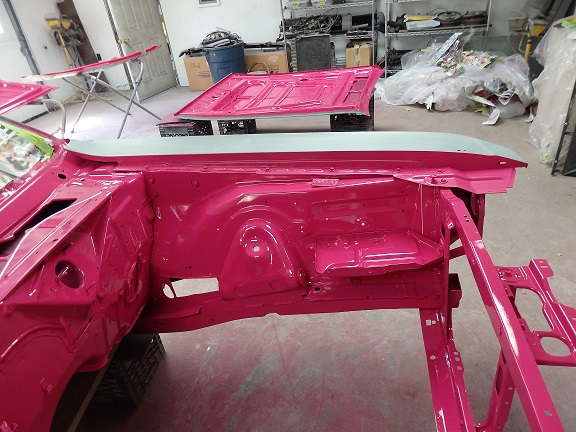
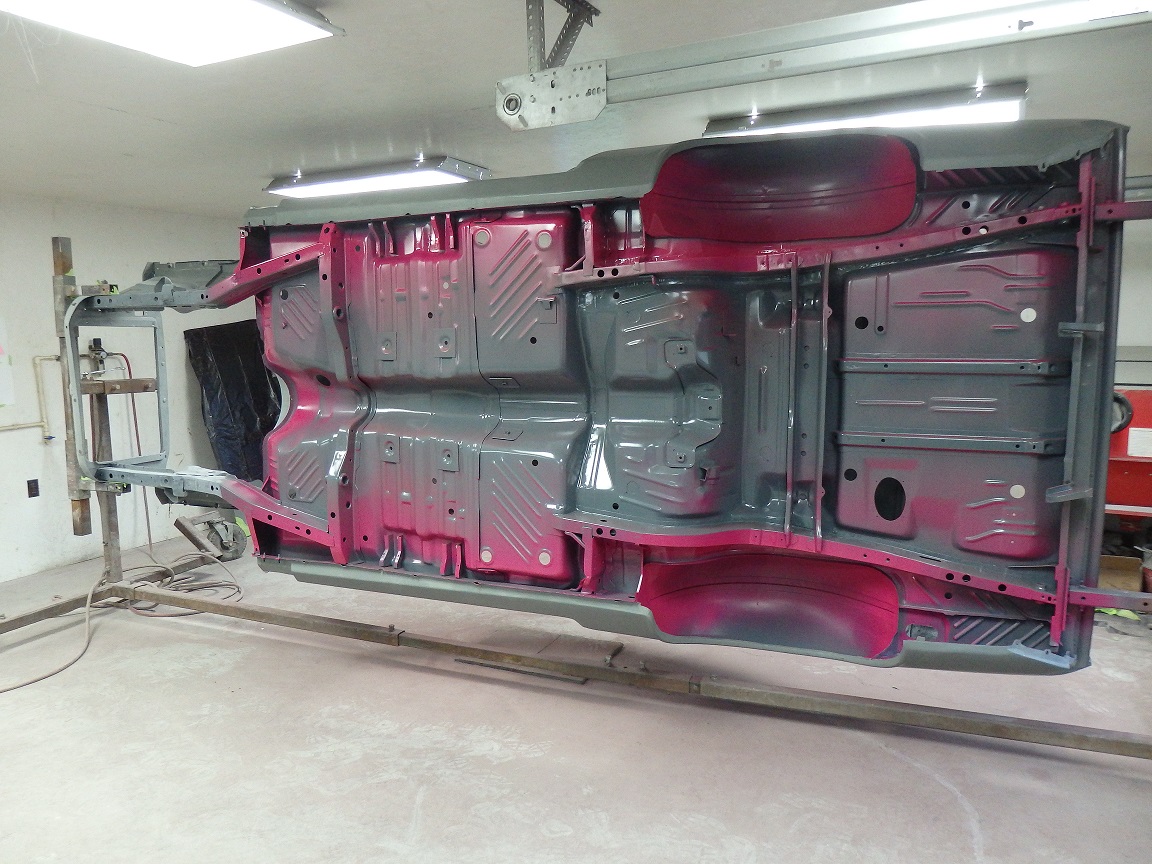 230) Lastly the undercarriage was oversprayed with Panther Pink paint. I tried to replicate what the undercarriage overspray actaully looked like for this car. Technically I'm not done with the undercarriage. Originally the rocker panel pinchwelds were blacked out producing some black overspray over the pink. I am holding off with the blackout until the car is fully painted and buffed. Then I will apply the backout for the radiator support, windshield opening and rockers all at the same time.
 |
 231) Here is a detail that is often missed. At the base of the rocker panel in the front are 2 U-nuts which are for mounting the fenders. It appears that people do not offer the correct repo U-nuts. The originals are round like these. I made sure to install them with the studs and twisted them in the orientation that they would be in once the fenders were installed.
 |
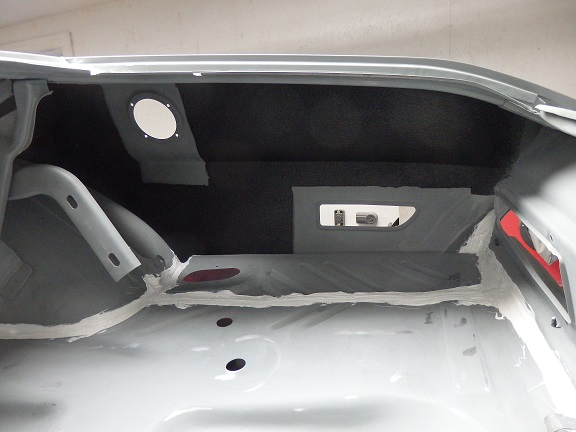
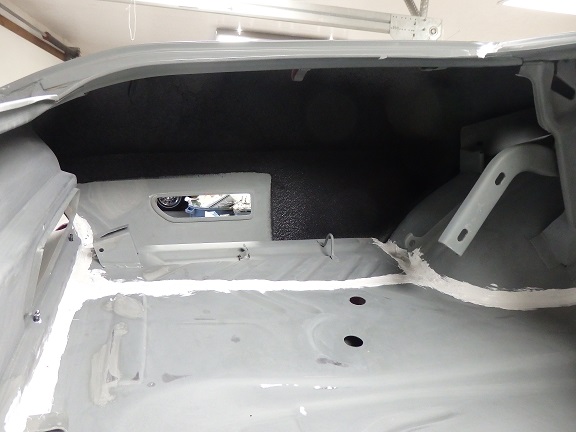
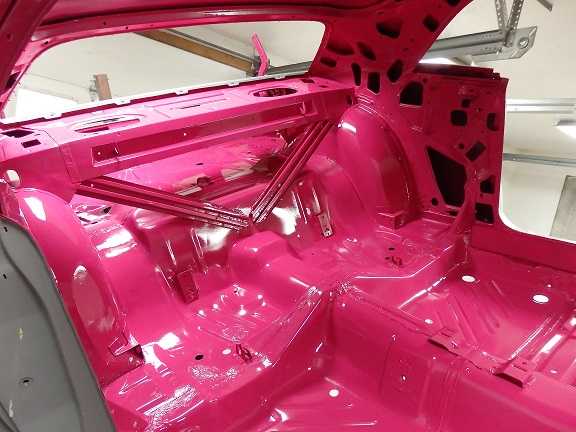
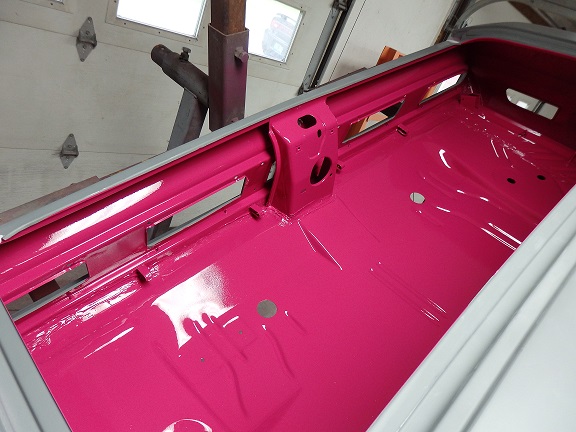
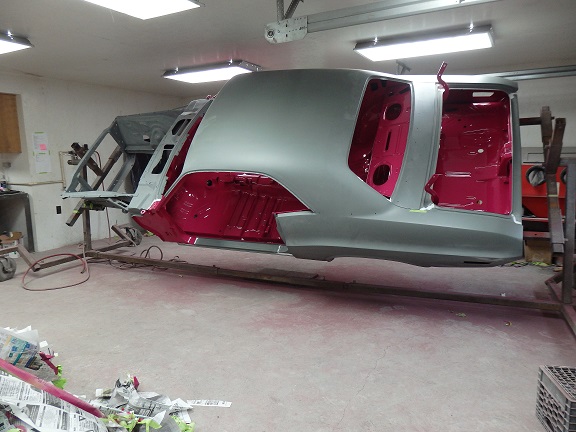 232) Finally some color! I started with the interior and trunk sanded with 180 grit disks on my oribital sander and about 20 red scotch bright pads. I sealed everything with 2 coats of DP40LF mixed as a sealer. After an hour plus for curing I commenced to paint the inside of the car. I used 1-1/2 quarts of basecoat (not reduced) to cover this much interior. I then laid down a single coat of clear (DBC2002 Concept Clear) and this is what it looked the following day after unmasking the car.
 |
 233) I painted the A-pillars and side panels so that I didn't have to worry about overspray on the door hinges when it came time to paint the outside of the car.
 |
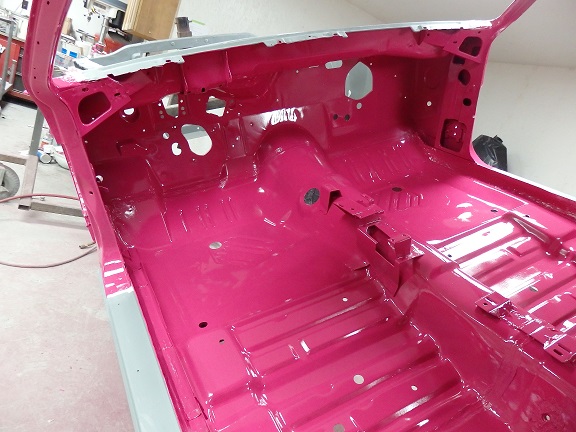
 234) The Black Jack Neoprene Super Flash Cement that I used to seal most of the seams covered real well. It looked just like the factory with the exception that the paint was not absorbed back into the sealer.
 |
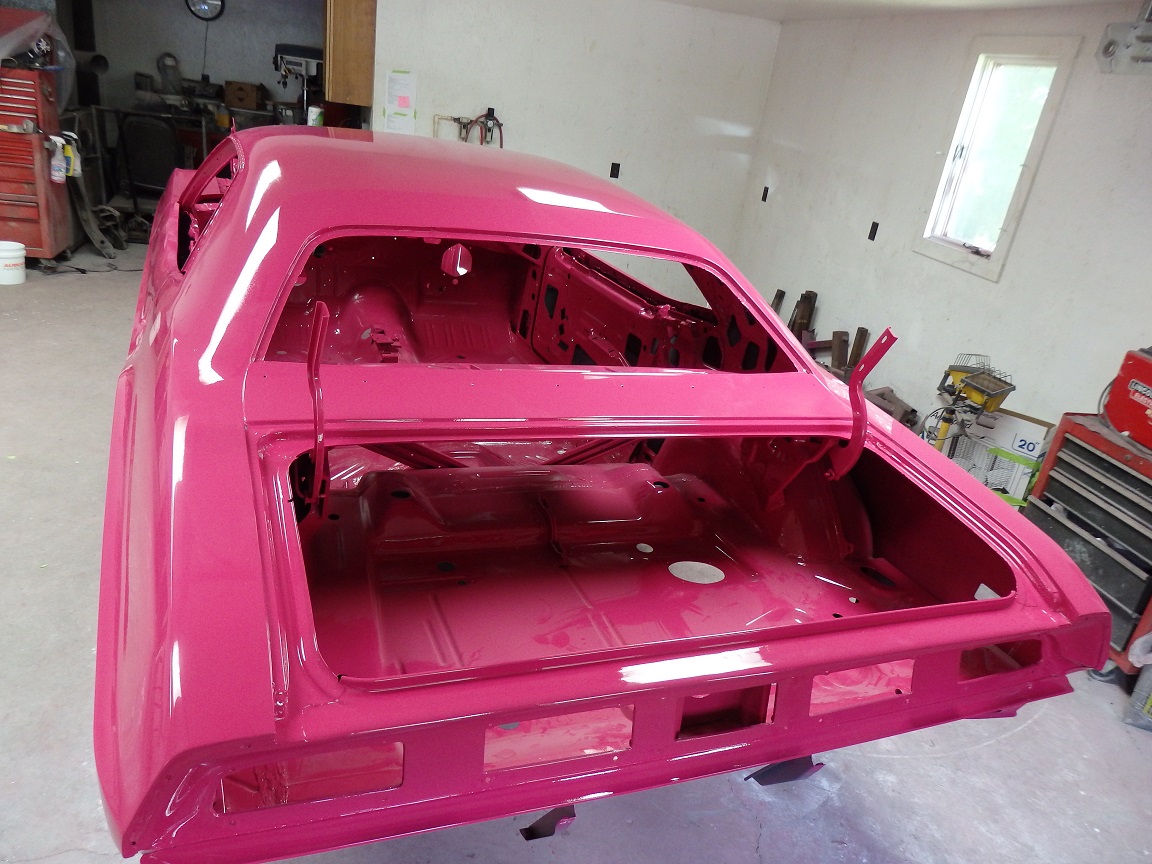
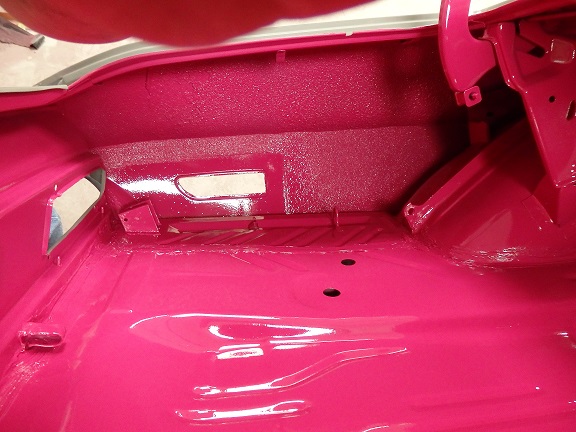
 235) The trunk was quite the pain in the butt to paint as expected. The inside of the quarter panels were hard to hit. I had to turn the car sideways and spray straight down to get one side and then had to rotated the car the other way to hit the opposite side.
 |
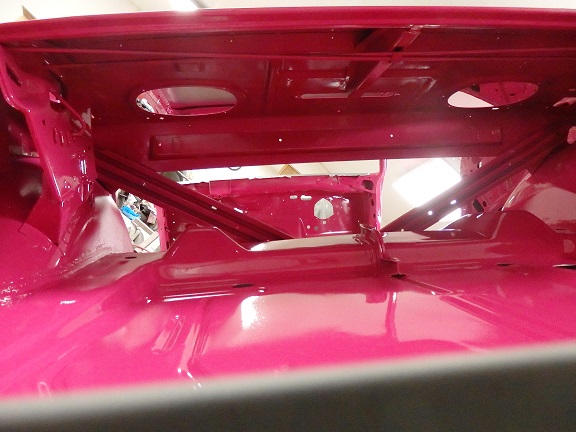 236) The underside of the dutchman panel was pretty hard to hit as well. I had to turn the car sideways to paint that area as will. One thing to note is that the factory originally installed the trunklid springs prior to paint.
 |
 237) The undercoating from RestoRick came out great. I sealed it, along with the rest of the trunk, with DP40LF epoxy primer and top coated it with paint. I had no issues at all with it.
In this picture you can see that I painted the trunk hinge sliders. This is what the factory did originally. The paint will flake off, but it is correct. |
 238) In this picture you can see the screws that protrude from underneath were painted as well. This is also factory correct. These little details (painted screws, painted hinge sliders, etc) all need to be observed during the teardown process in order to get them correct during restoration.
 |
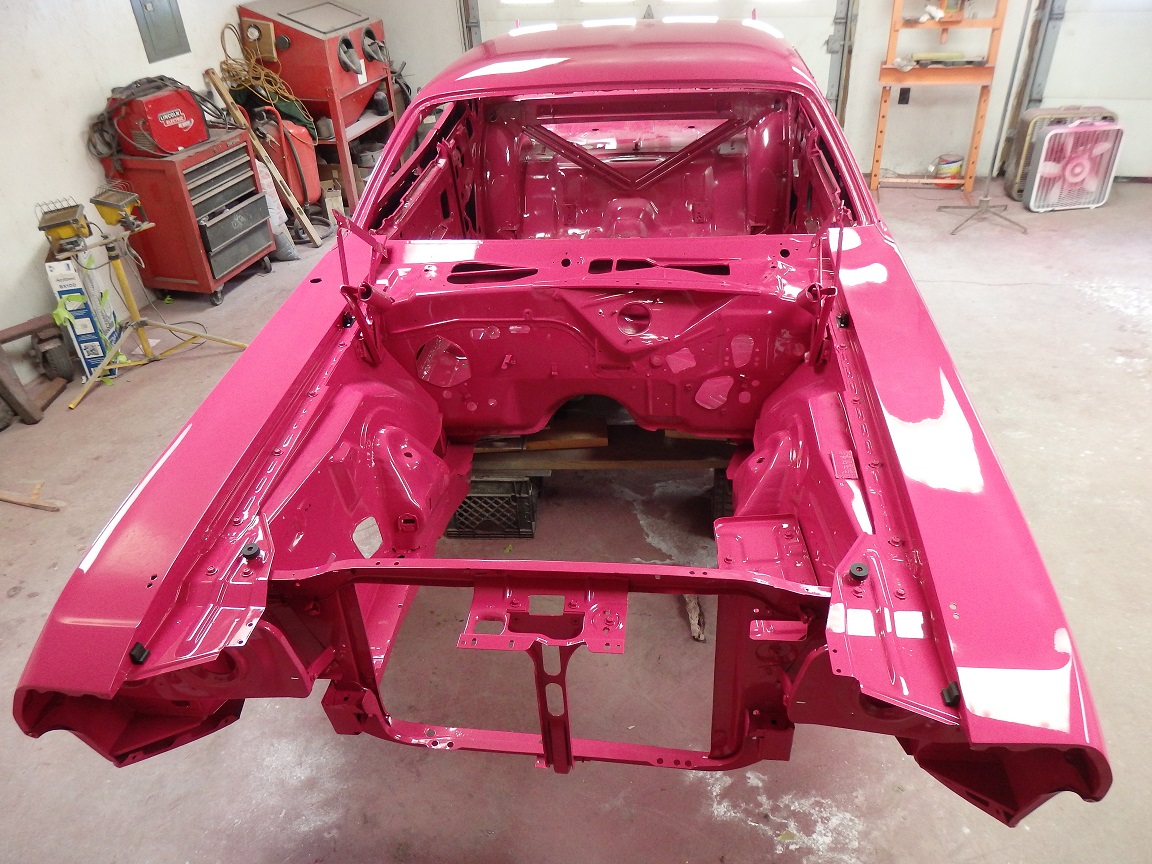
 239) The body was removed from the rotisserie for the rest of the painting process. The front fenders and hood latch support were installed prior to painting. The hood was temporarily installed to set the fenders and the hood latch support correctly. The grill and headlight bezels were temporarily installed to get the correct setting of the L-brackets inboard of the highbeam headlights. A very nice AMD repo battery tray was also installed. The original one was severly pitted from battery acid.
 The engine bay was then primed with DP40 epoxy primer mixed as a sealer. It is critical to prime over all of the bolts to get the get the factory correct look and to make sure that the paint would stick to them. |
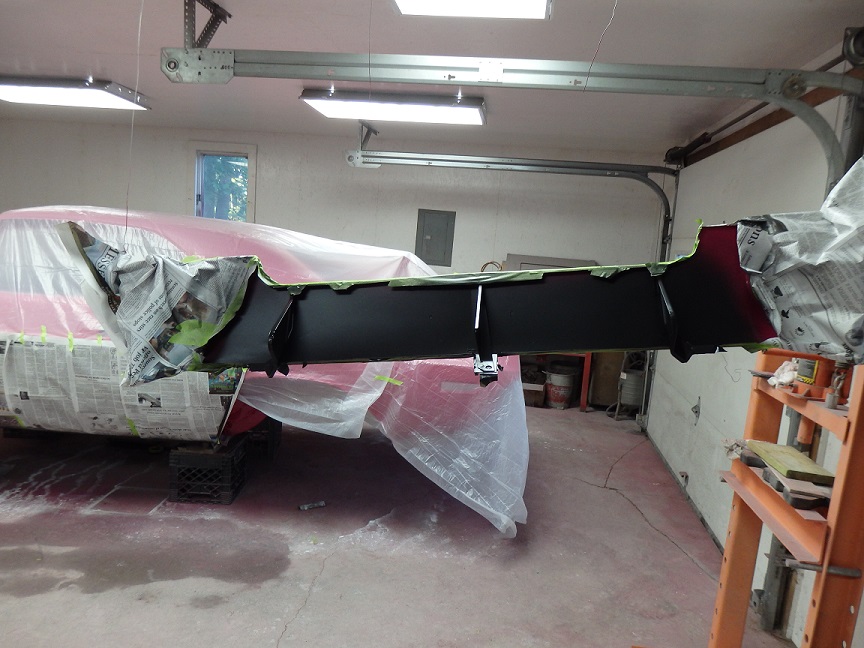
 240) Here it is after paint and clearcoat. I literally had to crawl on the floor to climb inside the engine bay to paint it.
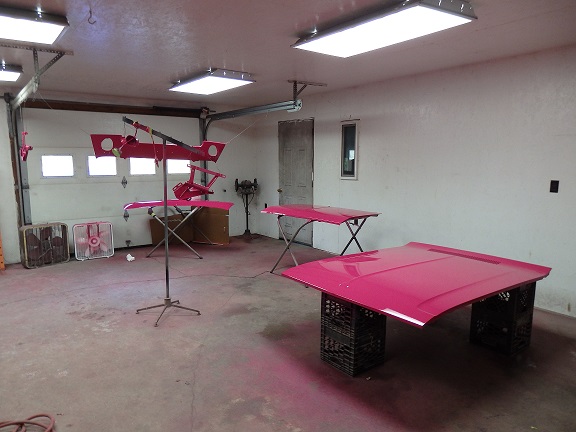
While painting the engine bay I painted the back side of the hood, trunk lid and rear valance. |
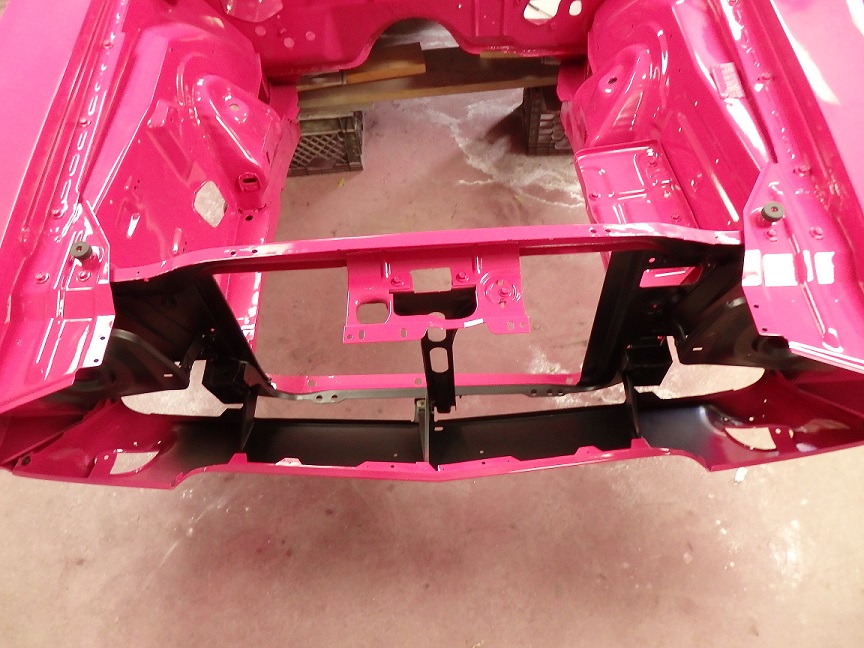
 241) One thing you may notice is that the inside edges of the fenders were not clearcoated. This is because I wanted to make sure that the color on the edges matched the engine bay. I also did not want the cut line for the clear to be on the top edge of the fender. When I painted the car I just misted some basecoat along the edge and cleared the fenders entirely. Edges and all.
Another thing worth mentioning is the fender tag. One screw was used to hold the tag in place prior to painting at the factory. The tag was bent up so that paint could reach the underside. Once painted the second screw was added. In my case I put down one coat of basecode before installing the fender tag with one screw. I then applied two more coats of basecoat in the engine bay and over the tag, followed by two coats of of clear. |