When I put the car on the rotisserie I was able to confirm that the frame was straight by taken measurements and comparing them against the frame specs in the service manual. However, there were indents in the frame (ahead of the K-member) that were filled with bondo and painted over to hide the repair.
The inner fenders were left pretty crinkled and were poorly straightened. They were also previously repaired (patched & bondo'd) at the hood hinge locations (pretty common on these cars). So I needed to replace them. There are several manufactures out there stamping metal for these cars and it is a challenge to find out who makes the best ones. They all claim they make "correct" panels, but none really do. After a whole bunch of research and asking people on webforums (www.cuda-challenger.com & www.moparts.com) to send pictures, I learned that Goodmark made the best repo inner fenders. So I bought a pair. After examining them I would say that except for not using the factory style hood hinge nuts, they are really close to the originals.
The radiator support is a different story. Nobody makes the upper piece with the wire retainers on them. You have to salvage your old ones. Also, the upper radiator support has a partial VIN stamped on it, so it best the save the original upper radiator support if you can. There are a few details on the top lip of the upper radiator support that the repos don't have, so you can tell if someone moved the partial VIN if you know what you are looking for.
As far as the radiator support filler panels, no one makes correct ones not matter what size radiator you have (22" or 26"). All of the repos use the wrong radiator mounting nuts and some manufacturers (though they claim they have correct details), even have circular depressions in the metal to fit their nonfactory correct nuts. This makes it real easy to tell that these panels have been changed.
Because of all this, I decided to fix the original radiator support pieces.
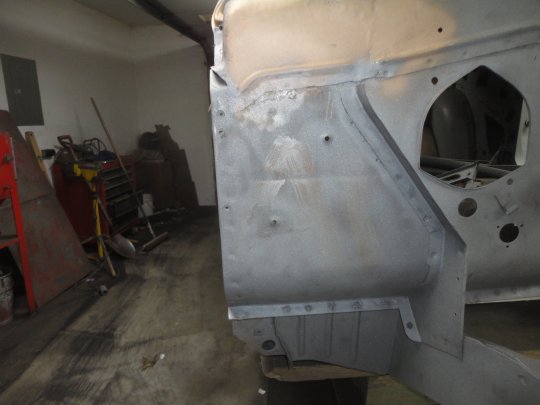
 121) Here is a picture from a year before. It shows some of the front end damage that needed to be repaired. Luckily the bodyshop did a pretty good job of straightening the frame 27 years ago.
 |
 122) Here's a picture from the top.
 |
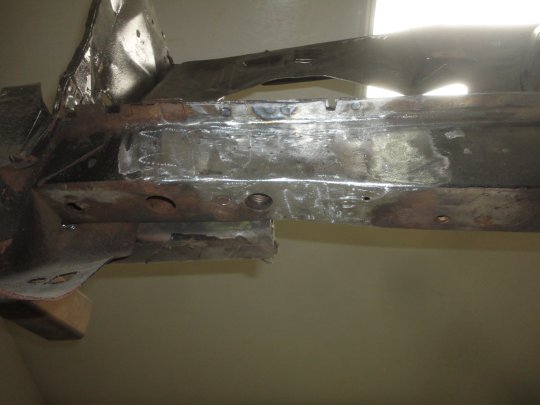
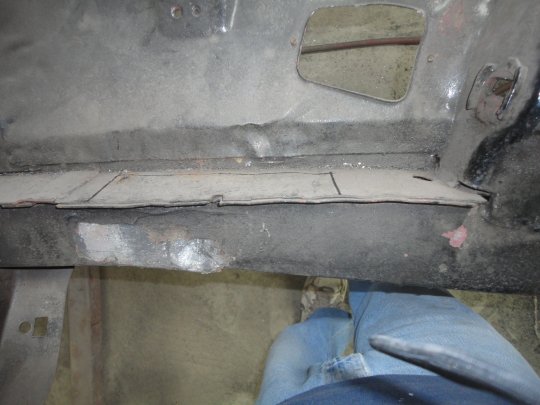 123) The frame horns were shoved over during the accident and were pulled back into position by the bodyshop. This left kinks on the side of the frame. Instead of fixing them properly, the bodyshop filled the kinks with bondo and painted over it with an aerosol can. Here you can see where I chipped away a big chunk of bondo. Notice the notch on the seam of the frame rail? That notch is where both front frame rails kinked. I wonder if the factory intended for the frame to kink in that location or perhaps it was just an alignment location for assembly.
At this point to fix it poperly, I had to cut the frame open and straighten out the kinks from the inside. |
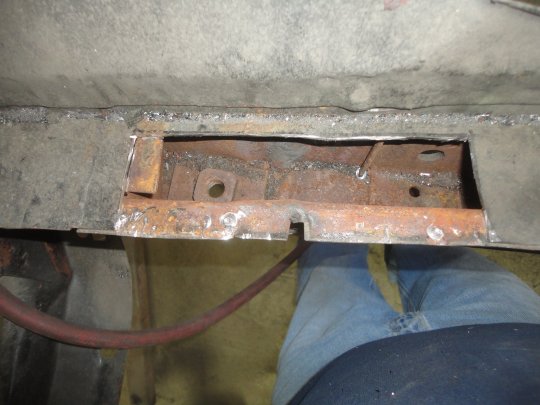 124) With the top open it was obvious that I needed to take a piece out of the side to access the kinks with a hammer.
 |
 125) Here it is opened all the way with the kink removed. This had to be accomplished with torches since the frame metal is so thick. The pieces that were removed were flattened on a metal plate I have on my work bench. In this picture I was getting ready to sandblast the inside before priming.
 |
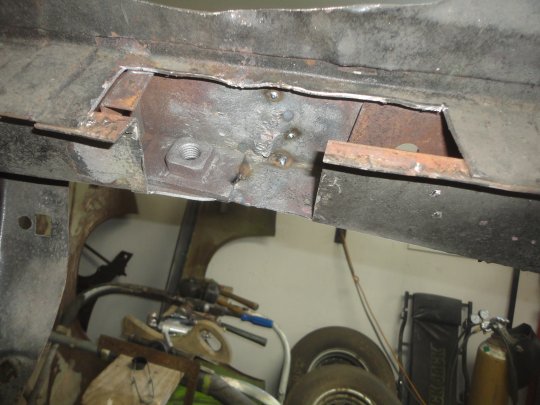
 126) Here it is all welded back together. It came out so well that filler will not be required.
 |
 127) Here's a shot from underneath. I detailed the repair using my pinch welder to get a factor look at the seam.
 |
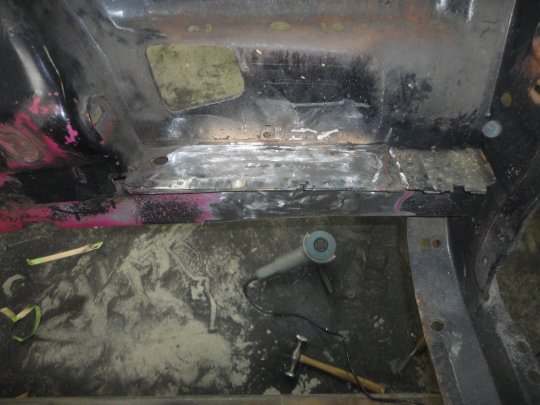
 128) The left side was much worse. The knotch was closed up because the frame was kinked in.
 |
 129) As with the left side, I cut the frame open and straightened the metal. Here it is all welded up. The notch came out pretty good.
 |
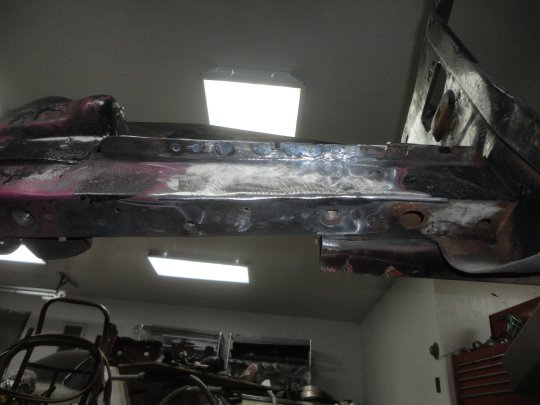 130) Here's a shot from the bottom. You can see that the notches don't quite line up. This is the way it originally came from the factory. You can also see the pinch welds I made to dress up the seam. As with the right side, no filler will be required to pretty up the repair.
 |
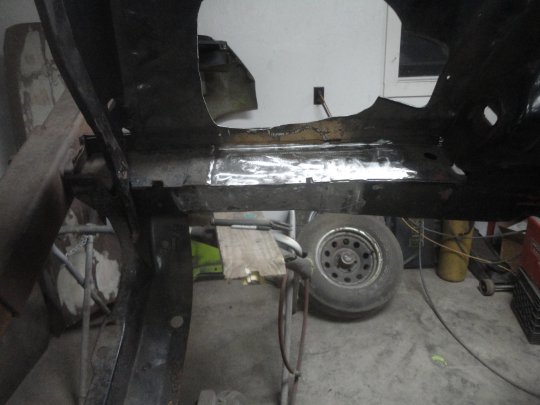
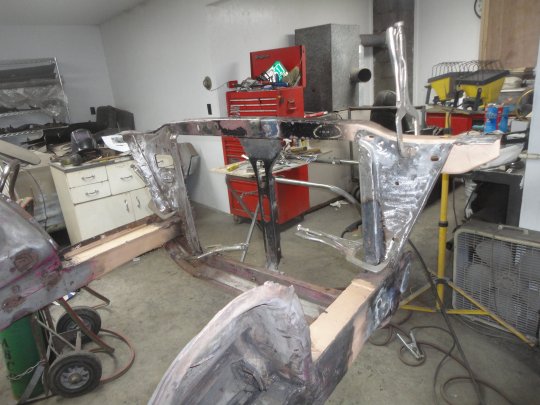
 131) I sprayed some weldthru primer on the repairs to protect them from corrosion while I worked on the radiator support. I should mention that I test fitted the K-frame to ensure that things still lined up after the frame rail repair. I also compared measurements of the frame and compared them to the measurements in the service manual. Things still were in alignment. Wheh!
 |
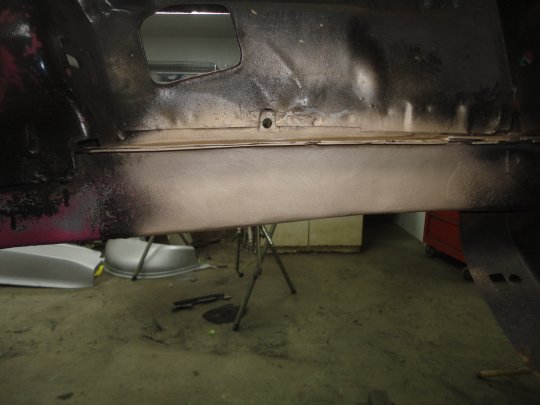
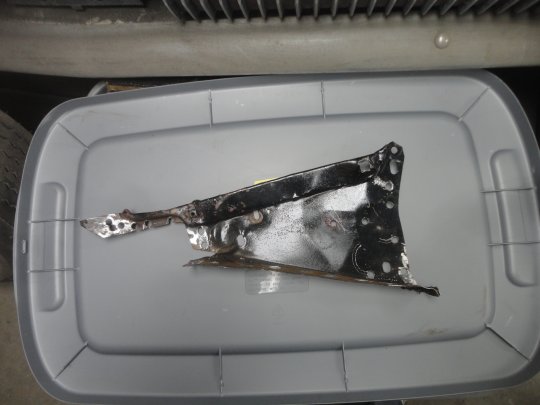
 132) Now on to the radiator support. Here is shot of the right side showning another terrible repair made by the body shop. The corner also took a hit from something while the car was being stored.
 |
 133) The first thing I had to do was remove the right hand radiator support filler panel. I spent a lot of time flattening it back out.
 |
 134) Then I had to make a new end piece that was ruined by the body shop. In this picture I was fitting the new piece in place prior to buttwelding it to the filler panel.
 |
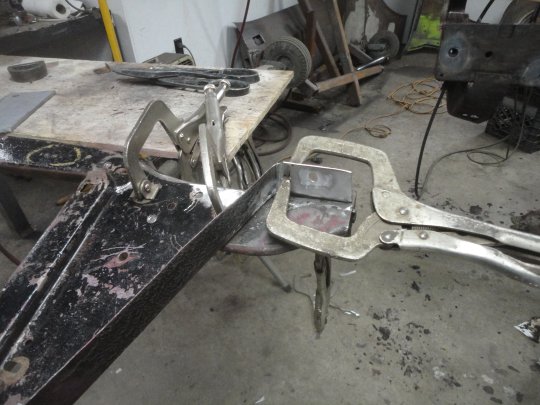
 135) The left hand radiator support filler panel need to be straightened as well, but didn't need to be removed from the upper radiator support. Here is the radiator support all straightened and clamped together in place to confirm proper alignment.
 |
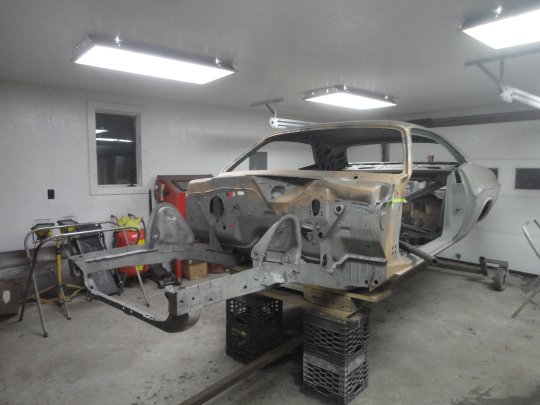 136) The next thing to do was to sandblast the entire front end. I had to do this indoors so I built a makeshift booth around it with plastic and PVC pipe. Here it is after blasting with the booth removed and the mess cleaned up.
 |
 137) I made a discovery while sandblasting. A big "A1" was painted by brush on the right hand cowl before the car was painted. Not sure what it means. Probably had to do with the order that the car was placed in line at the factory going into the paint shop or could just be just a code that was written on it when the cowl was in the stack of AC firewalls.
 |