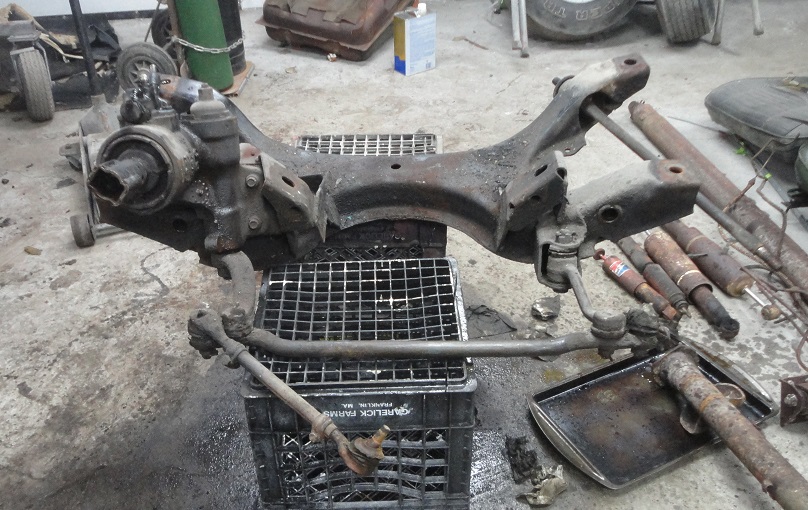
 336) Chrysler designed these cars using a K-frame.The entire steering, suspension, engine and transmission were built up on the K-frame, which
was then installed as one unit from below. That was the plan for reassembly of this car.
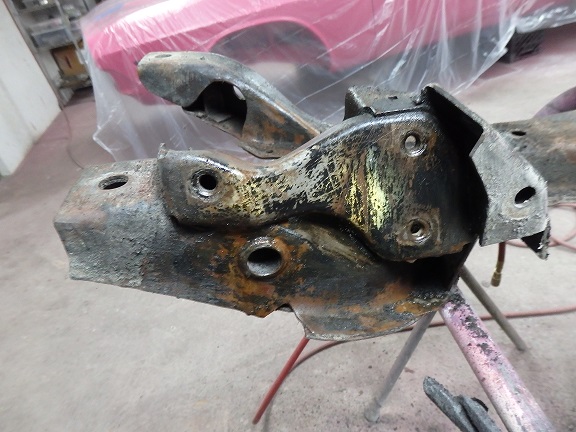
336) Chrysler designed these cars using a K-frame.The entire steering, suspension, engine and transmission were built up on the K-frame, which
was then installed as one unit from below. That was the plan for reassembly of this car.With the engine and transmission completed, it was time to get the K-frame going. This is what I started with. |
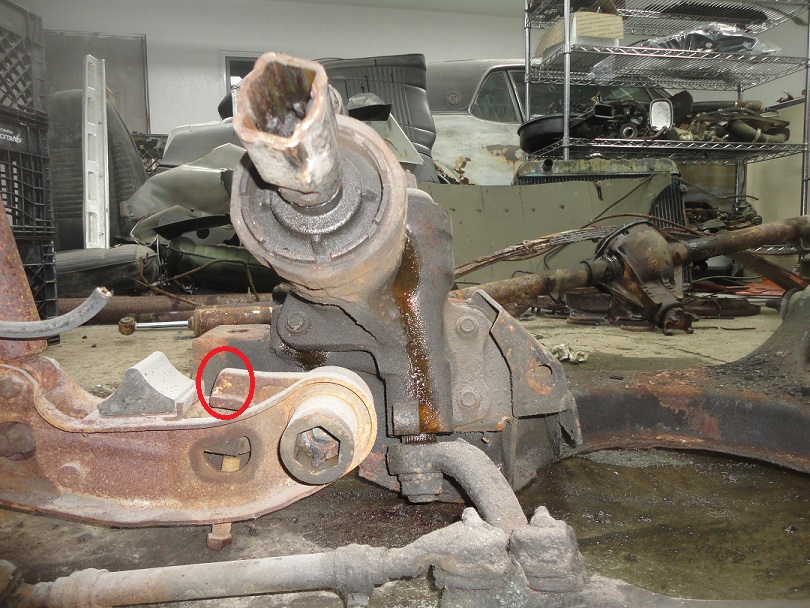
 337) There are lots of markings on the K-frame components. Most are inspection marks and for designating left and right side components.This is the time
to start documenting the markings.
337) There are lots of markings on the K-frame components. Most are inspection marks and for designating left and right side components.This is the time
to start documenting the markings. Though they obvously go on one way, the toggles on the lower control arms have paint markings. White for the left side and orange for the right. |
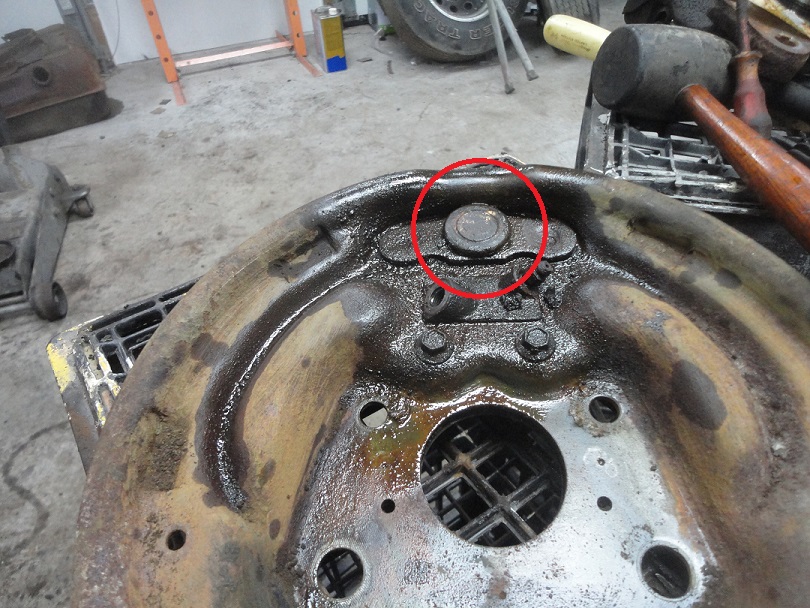
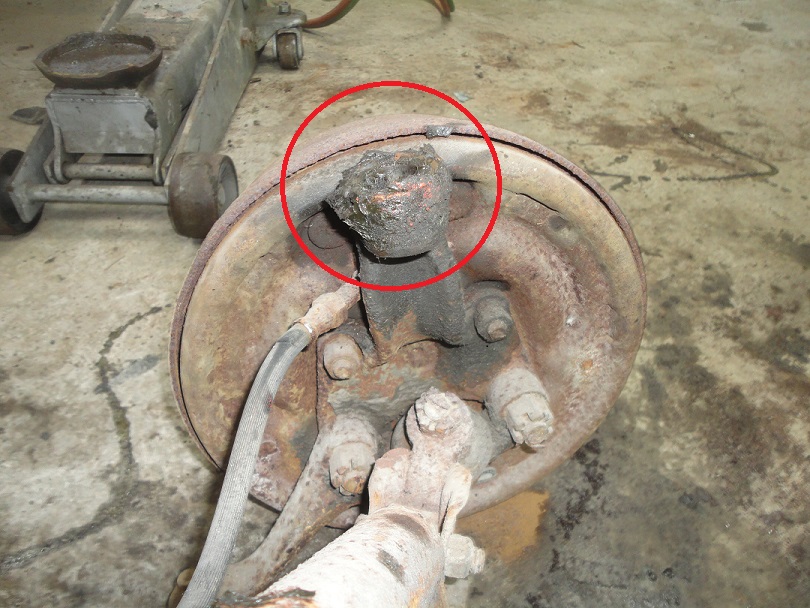
 338) Hidden behind the upper ball joint, the brake backing plates have a white mark for the left side and a yellow mark for the right. It is assumed that
this is for quick identification during assembly.
338) Hidden behind the upper ball joint, the brake backing plates have a white mark for the left side and a yellow mark for the right. It is assumed that
this is for quick identification during assembly. |
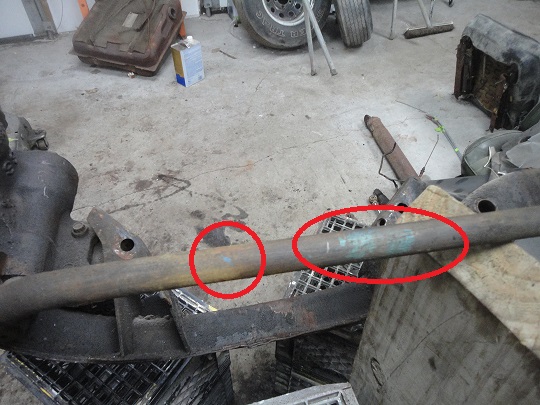
 339) On this car the steering center link and the pitman arm both have blue paint markings. Must likely for quick indetification during assembly.
 |

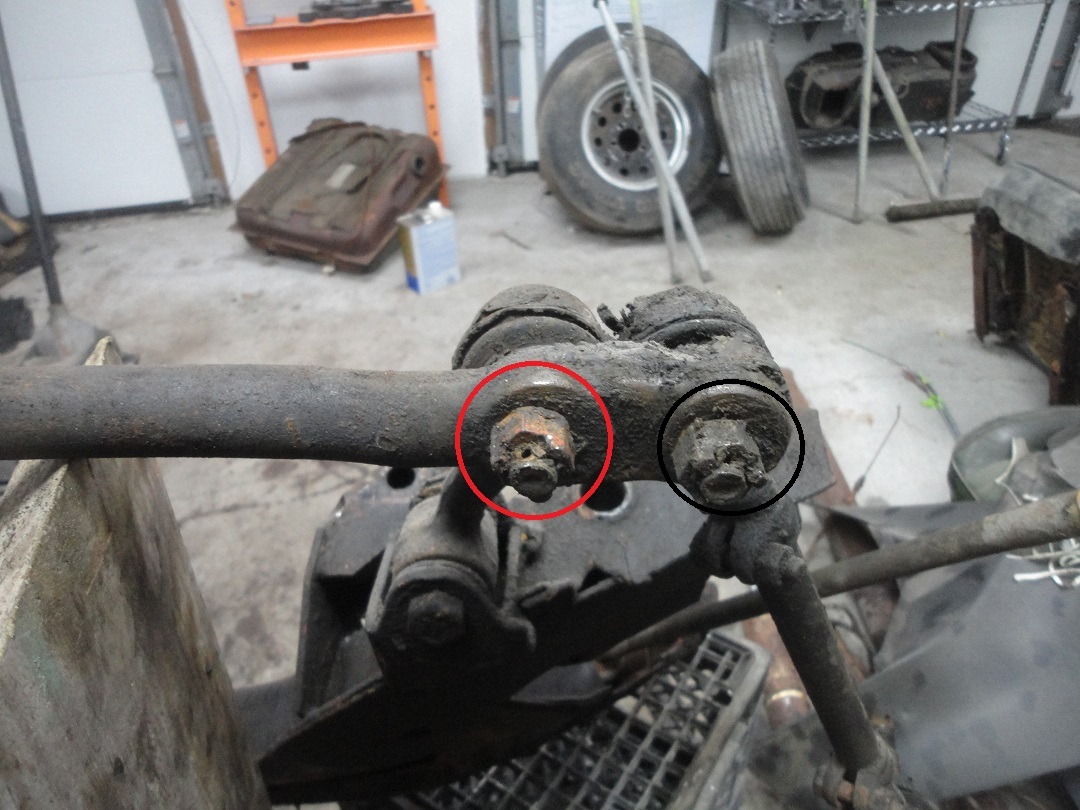 340) All of the ball joint tricastle nuts have red paint inspection markings on them which were placed after the nuts and the cotter pins were installed.
As a rule of thumb, if it had a cotter pin on it, it was inspected and marked. There was paint found on all 4 ball joint nuts on the center link.
340) All of the ball joint tricastle nuts have red paint inspection markings on them which were placed after the nuts and the cotter pins were installed.
As a rule of thumb, if it had a cotter pin on it, it was inspected and marked. There was paint found on all 4 ball joint nuts on the center link. |
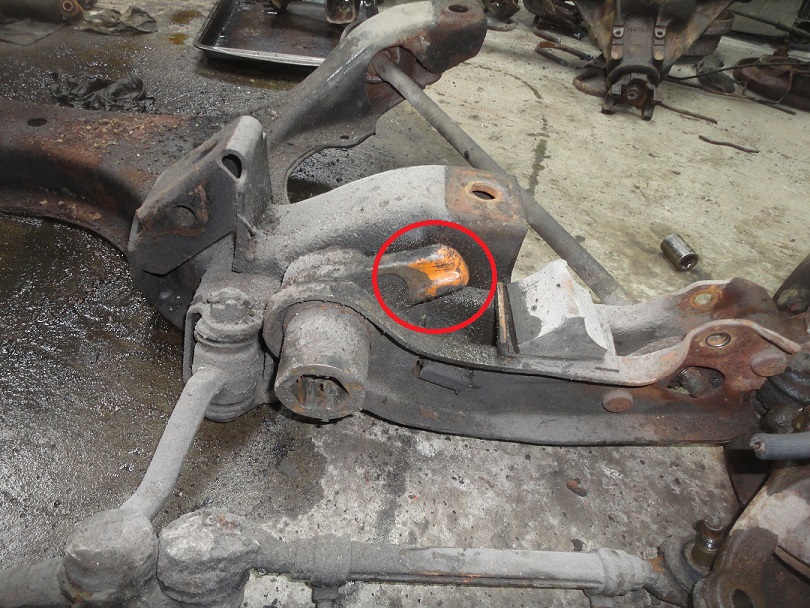
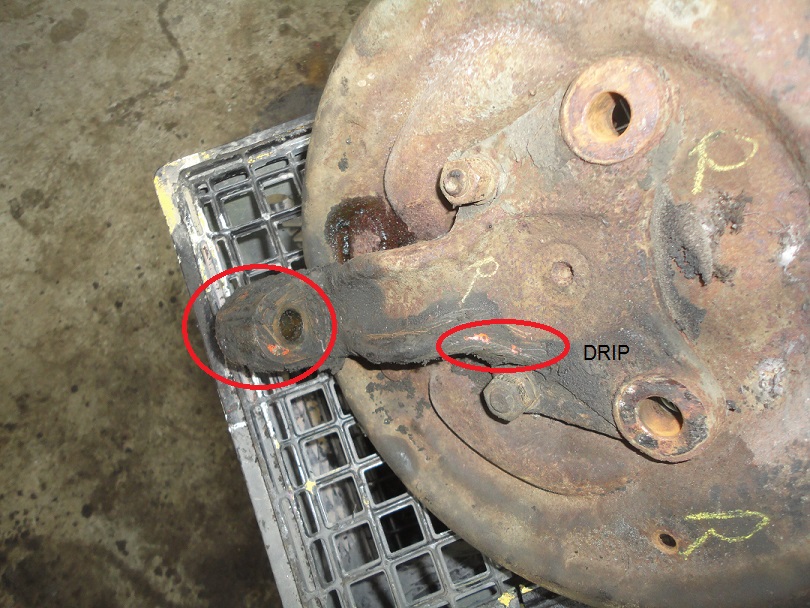 341) Here are the paint markings for the upper ball joints. Notice the drippings on the right one.
 |
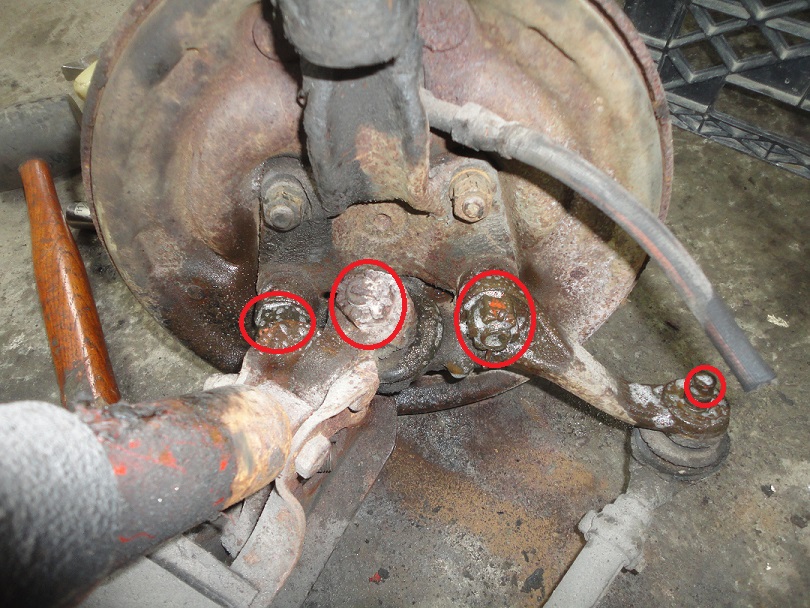 342) Here are the paint markings on the nuts connecting the spindle to the lower control arm ball joints. Not all nuts were tricastle nuts. Only ball joints received tricastle nuts.
 |
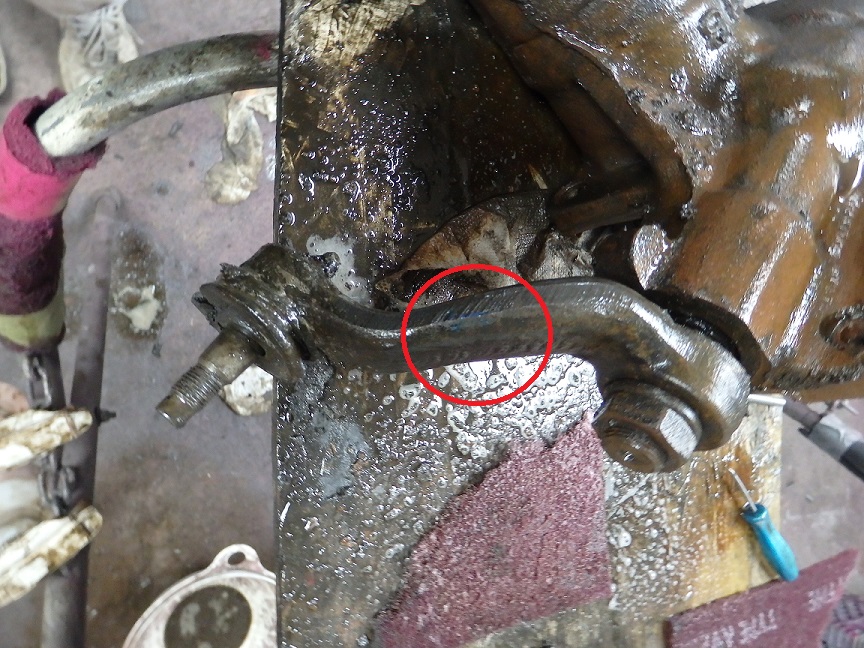
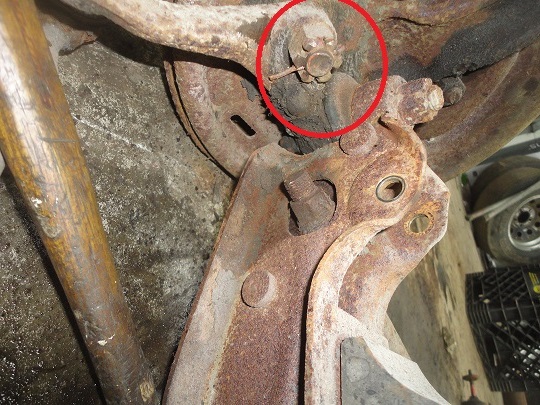
 343) The tied rod link clamps also had paint markings.
 |
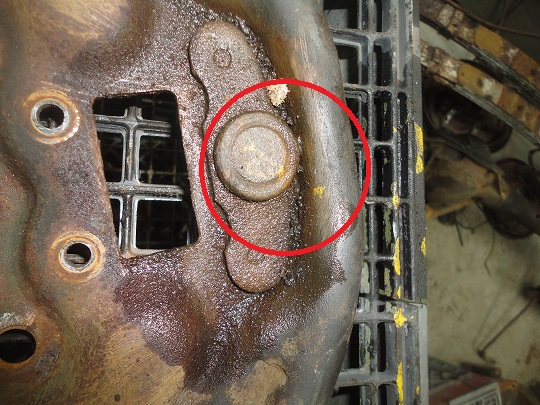
 344) Removing the power steering gear box revealed these sprayed yellow paint markings. I suspect that this was an indication that a power steering gear box was to be installed.
 |
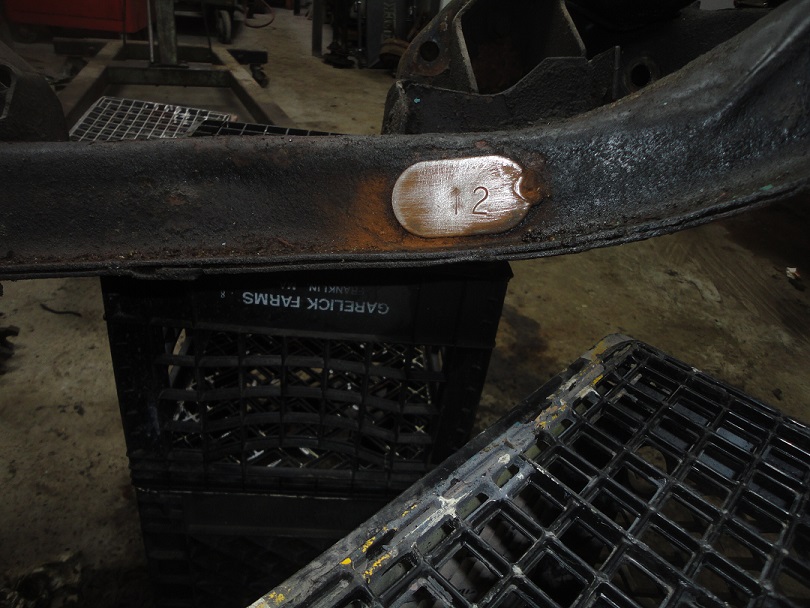
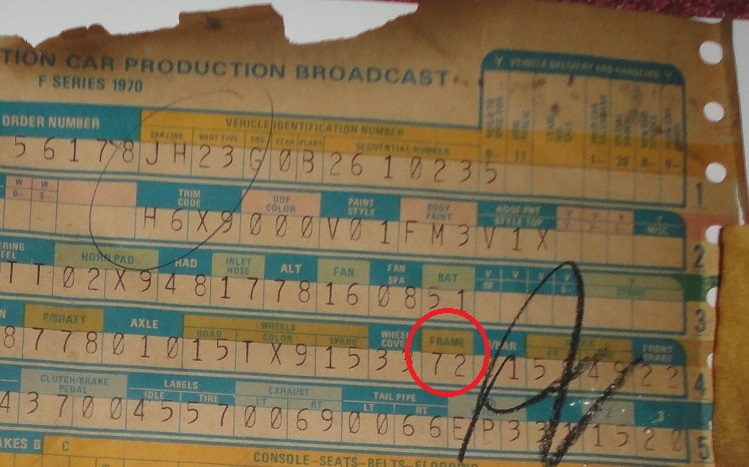 345) The K-frame has a metal tag with a number stamped on it which is a partial part number (12). This appears to be a different number than the broadcast (72), which probably indicates
the K-frame assembly part number and not the raw frame.
345) The K-frame has a metal tag with a number stamped on it which is a partial part number (12). This appears to be a different number than the broadcast (72), which probably indicates
the K-frame assembly part number and not the raw frame. |
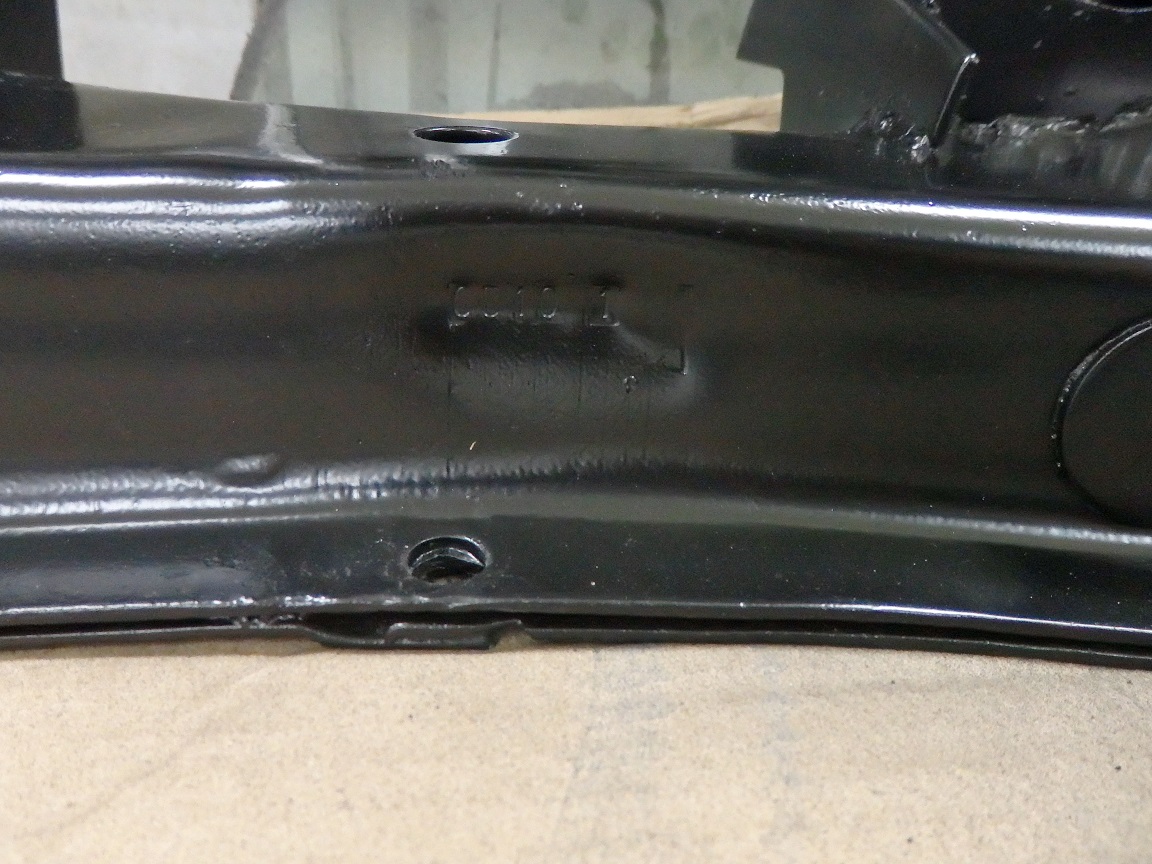 346) I sent the K-frame out to get sandblasted and powder coated. Here yoou can see the K-frame assembly date 0510 which indicates the 51st day of 1970 (Feb 20, 1970), which is 4 days
before the car was assembled. The "1" most likely indicates "first shift".
346) I sent the K-frame out to get sandblasted and powder coated. Here yoou can see the K-frame assembly date 0510 which indicates the 51st day of 1970 (Feb 20, 1970), which is 4 days
before the car was assembled. The "1" most likely indicates "first shift". |
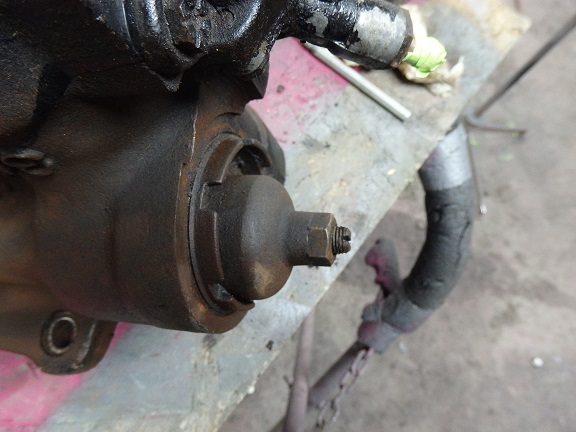
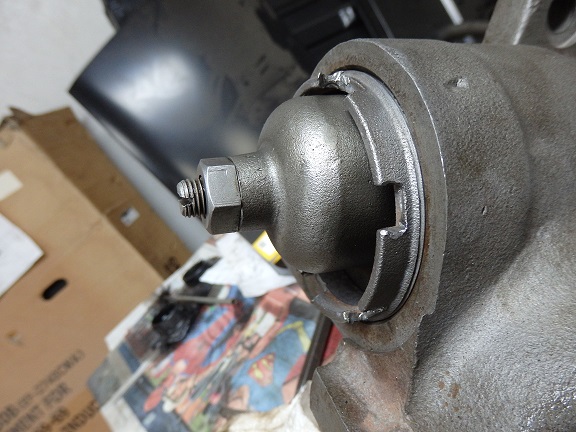
 347) Before rebuilding the power steering gear box, close-up pictures were taken of the adjuster nut location to be used as a reference for
setting the adjustment when it went back together.
347) Before rebuilding the power steering gear box, close-up pictures were taken of the adjuster nut location to be used as a reference for
setting the adjustment when it went back together.With things properly sealed up, the gear box was then sandblasted. |
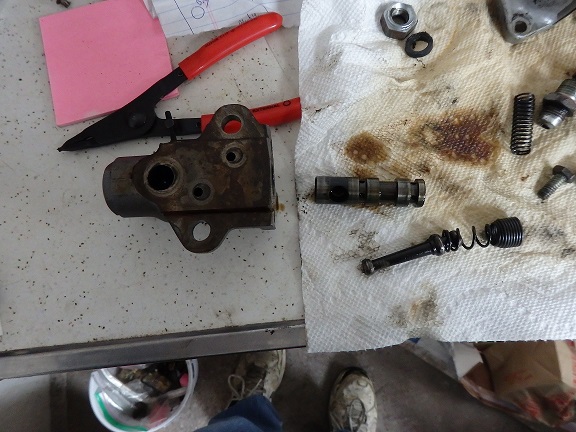
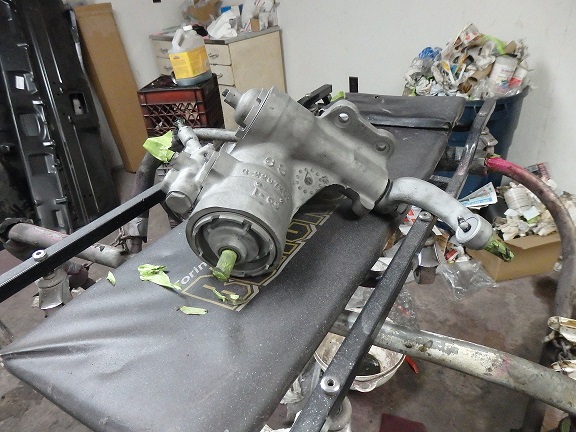
 348) Rebuilding the gear box is rather straight forward. It's a little tricky to remove the head though.
 |
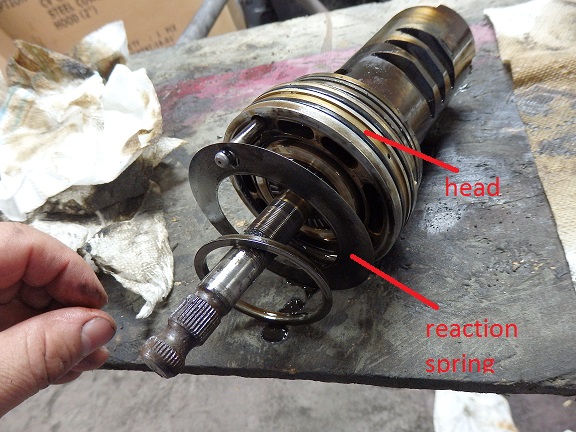
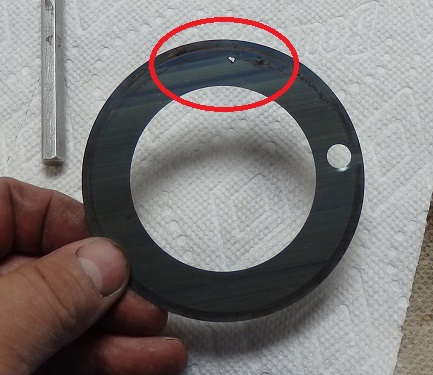 349) The head should be disassembled, cleaned and inspected. In this case a rust hole was found in the reaction spring. I was luck enough to locate
a used gear box that had a good reaction spring in it. Otherwise I would have had issues with the power steering. Some people replace the reaction springs
with thicker ones to stiffen up the steering.
349) The head should be disassembled, cleaned and inspected. In this case a rust hole was found in the reaction spring. I was luck enough to locate
a used gear box that had a good reaction spring in it. Otherwise I would have had issues with the power steering. Some people replace the reaction springs
with thicker ones to stiffen up the steering. |
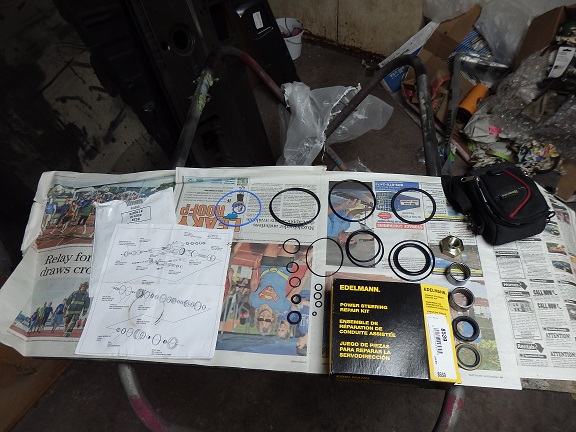
 350) Rebuild kits are pretty easy to come by.
Setting the adjustment was pretty easy using the original picture as a reference. Once set, the entire gear box was sealed in DP90LF epoxy primer and painted satin black (not pictured). Originally power steering gear boxes were painted black, rather poorly. Manual steering gear boxes were left natural. |
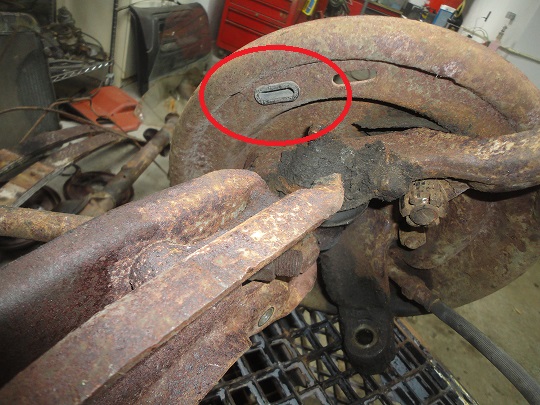
 351) A few things were noted before digging into the brakes. Only one original adjuster plug was found on the car. Also the secondary spring is of the
shorter variety (more on that shortly).
351) A few things were noted before digging into the brakes. Only one original adjuster plug was found on the car. Also the secondary spring is of the
shorter variety (more on that shortly). |
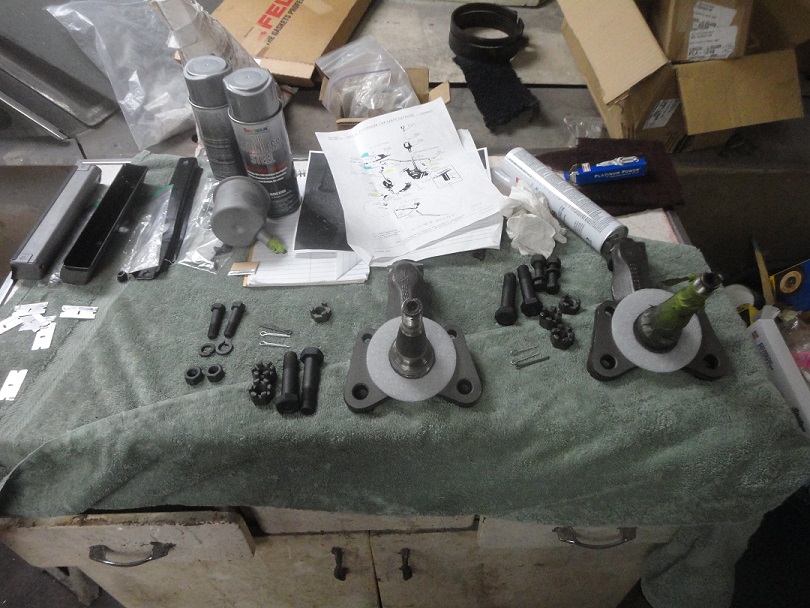
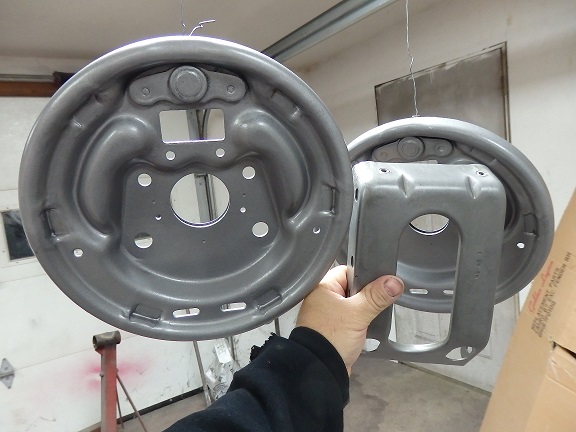 352) The spindles where sandblasted and painted with a cast gray paint. The bolts were cleaned and coated with Eastwoods black phosophate paint. The nuts were new
ones purchased from AMK Products.
352) The spindles where sandblasted and painted with a cast gray paint. The bolts were cleaned and coated with Eastwoods black phosophate paint. The nuts were new
ones purchased from AMK Products. The backing plates where sandblasted, primed with epoxy primer, painted with Seymour Stainless Steel paint and top coated with a satin clear to take the shine down. In the picture I am holding a piece of the restored pedal support as a reference. The pedal support was soaked in acid and clear coated. The painted backing plates turned out to look very close in color to the bare steel pedal support. |

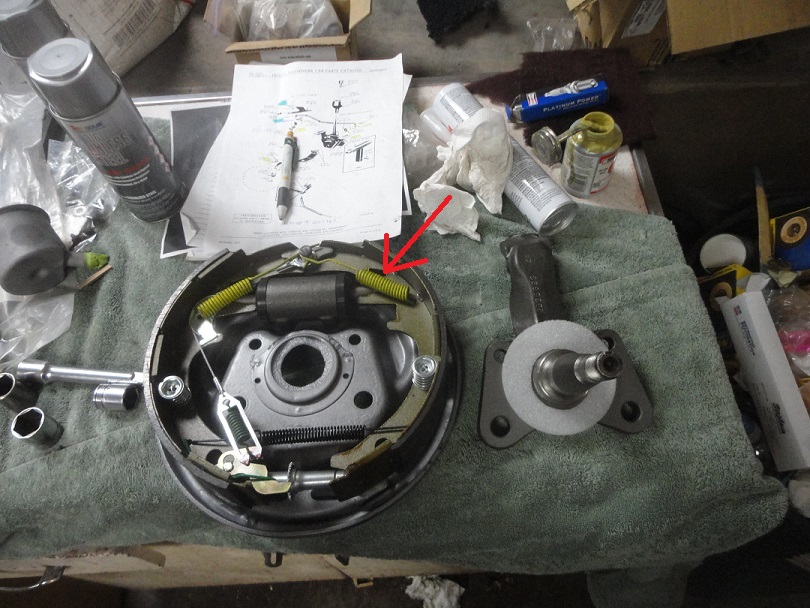 353) I like to assemble the brakes with the backing plates off the car. The yellow paint mark indicates that this is the right side. Note the correct adjuster hole plugs.
Notice that the secondary spring is of the larger variety? That is because the brand of brake shoes I bought did not have a round hole to fit the short style spring that comes in all of the spring packages (Refer to the red arrow). As it turns out the factory originally used the longer springs which I used here, but I had to buy 2 extra brake spring kits to get the springs I needed for the whole car. Another thing worth noting is the foam gaskets. The one that goes inbetween the spindle and the backing plates is eadily available, but it appears no one makes the one that goes in the little pocket on the inside. I made them myself. |
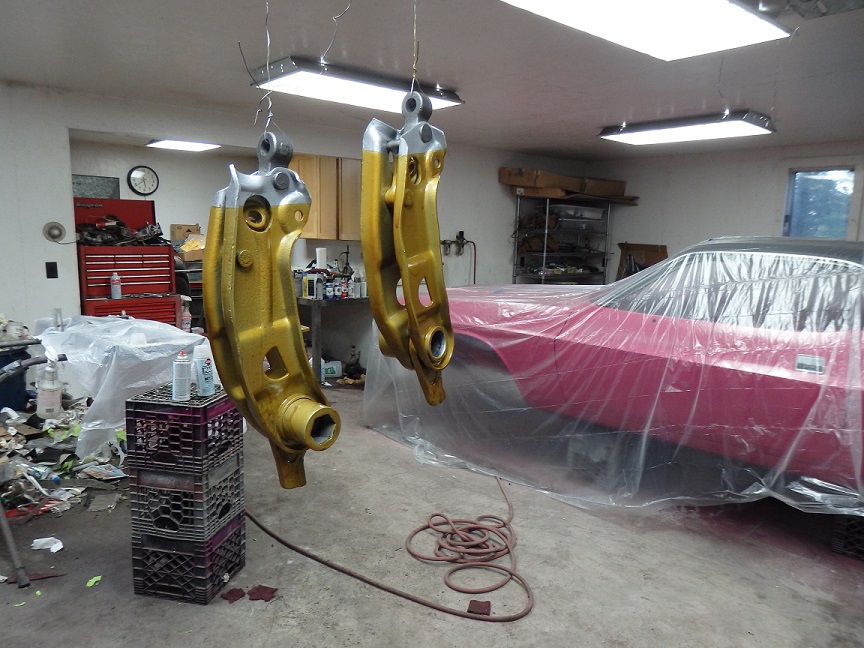 354) The lower control arms were sandblasted and primed with epoxy primer. The bushings were also replaced, which involved the use of a press and a 3" piece of pipe. The overall finish was achieved
by first painting them with plasicote dull aluminum paint. Followed by being painted with Quasmoline by Resto Rick. Quasmoline is a special mix that Rick sells that simulates the original Cosmoline coating
that the factory originally dipped the arms in. Then finally the cast portion where the balljoint attaches was painted with cast gray (not from eastwood). Care should be taken when attempting this yourself, since
this process involved 3 different paints that had to work well together without lifting.
354) The lower control arms were sandblasted and primed with epoxy primer. The bushings were also replaced, which involved the use of a press and a 3" piece of pipe. The overall finish was achieved
by first painting them with plasicote dull aluminum paint. Followed by being painted with Quasmoline by Resto Rick. Quasmoline is a special mix that Rick sells that simulates the original Cosmoline coating
that the factory originally dipped the arms in. Then finally the cast portion where the balljoint attaches was painted with cast gray (not from eastwood). Care should be taken when attempting this yourself, since
this process involved 3 different paints that had to work well together without lifting. |
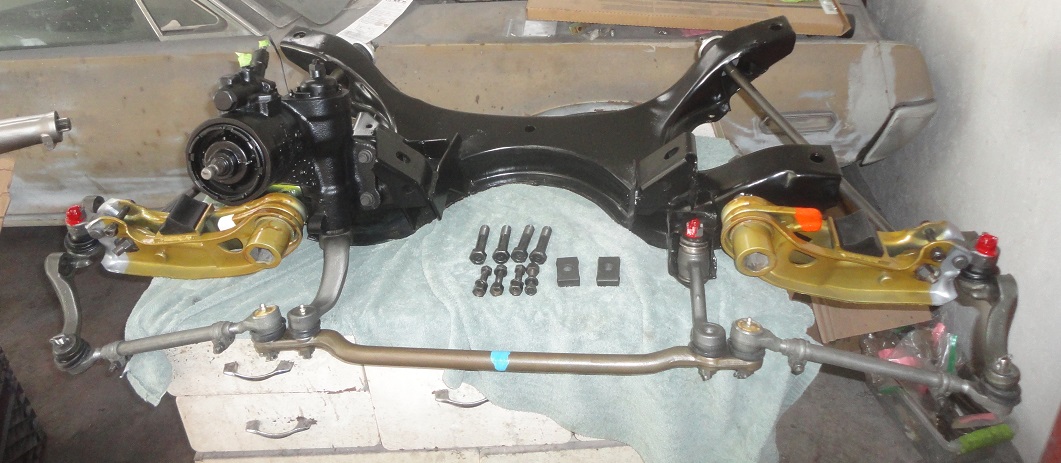 355) Assembly is quick and easy. Some of the inspection marks were applied at this point. It should be noted that they do not reproduce the pitman arm for this car. The repo idler arms also do not look like the originals. I ended up restoring the originals. All of the ball joint dust
boots were reproductions from Roger Gibson Restorations. Everyone else sells the wrong pitman arm boot. It should also be noted that the nuts on the pivot pins are left loose at this time. They are tightened once the torsion bars
are installed and the car is resting on its wheels.
355) Assembly is quick and easy. Some of the inspection marks were applied at this point. It should be noted that they do not reproduce the pitman arm for this car. The repo idler arms also do not look like the originals. I ended up restoring the originals. All of the ball joint dust
boots were reproductions from Roger Gibson Restorations. Everyone else sells the wrong pitman arm boot. It should also be noted that the nuts on the pivot pins are left loose at this time. They are tightened once the torsion bars
are installed and the car is resting on its wheels. |