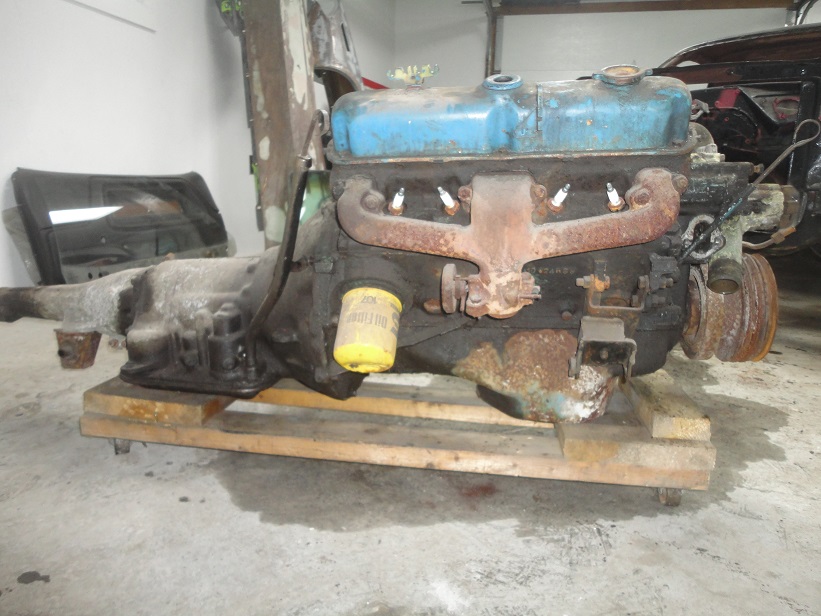
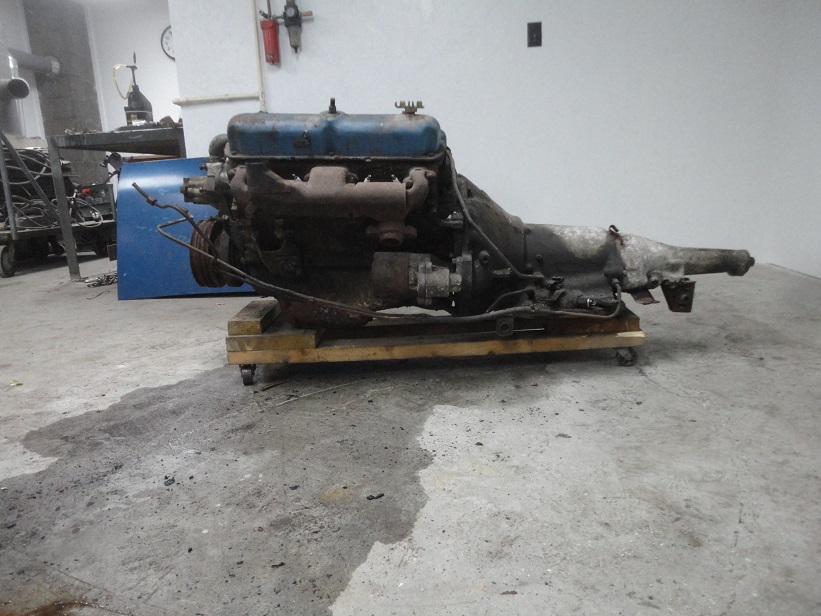
 301) Here's the engine after 3 years of sitting under my workbench. One of the first things I noticed was that one of the frost plugs was replaced with a
removable one by a previous owner. Not sure why, perhaps it was just a way to drain the block for winter storage. Still that is a red flag that something
may be wrong. Hopefully the block wasn't cracked. It was still filled with antifreeze so it may be ok.
301) Here's the engine after 3 years of sitting under my workbench. One of the first things I noticed was that one of the frost plugs was replaced with a
removable one by a previous owner. Not sure why, perhaps it was just a way to drain the block for winter storage. Still that is a red flag that something
may be wrong. Hopefully the block wasn't cracked. It was still filled with antifreeze so it may be ok. |
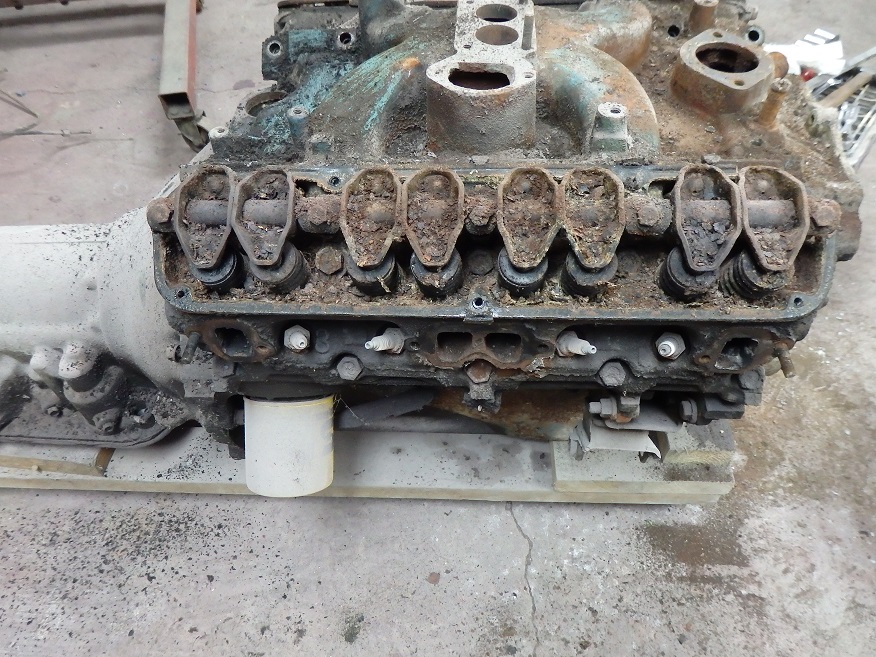
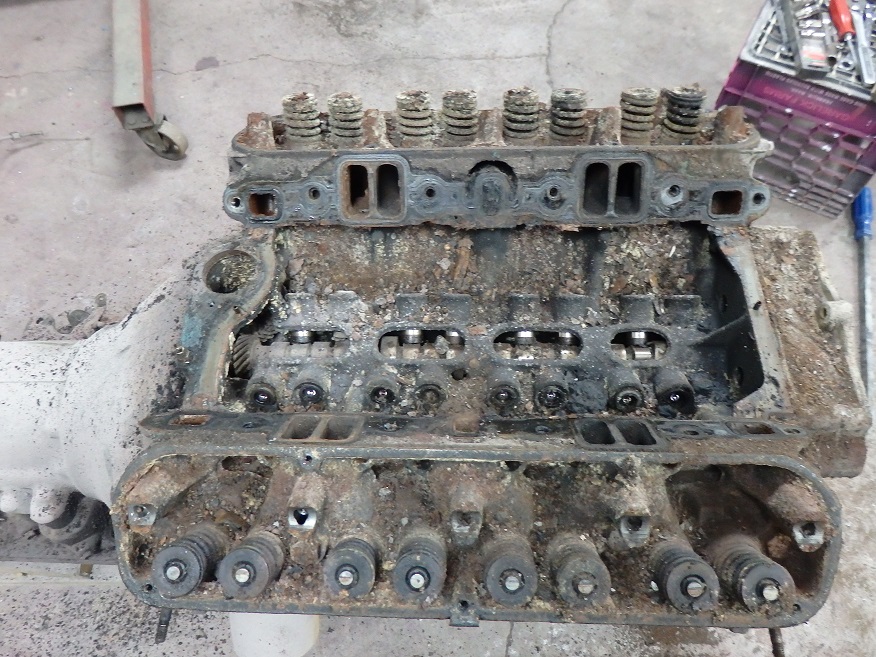
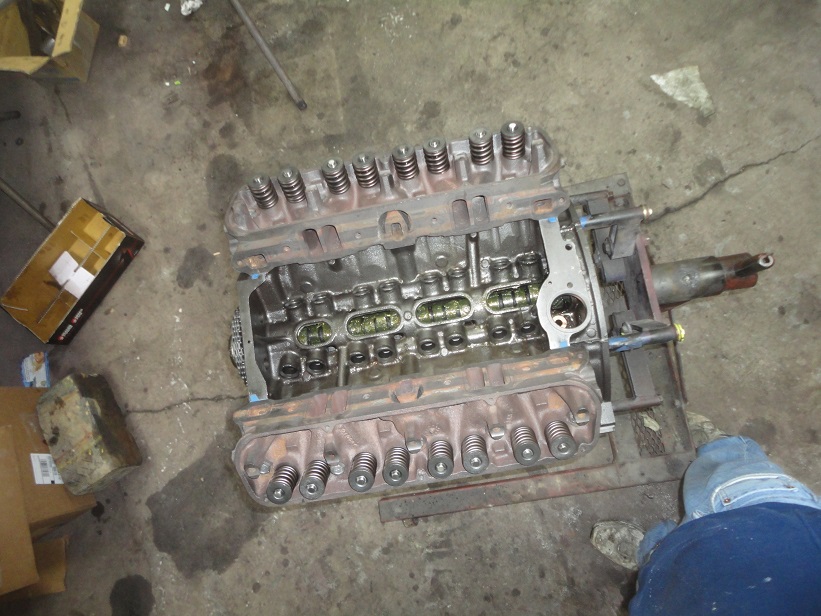
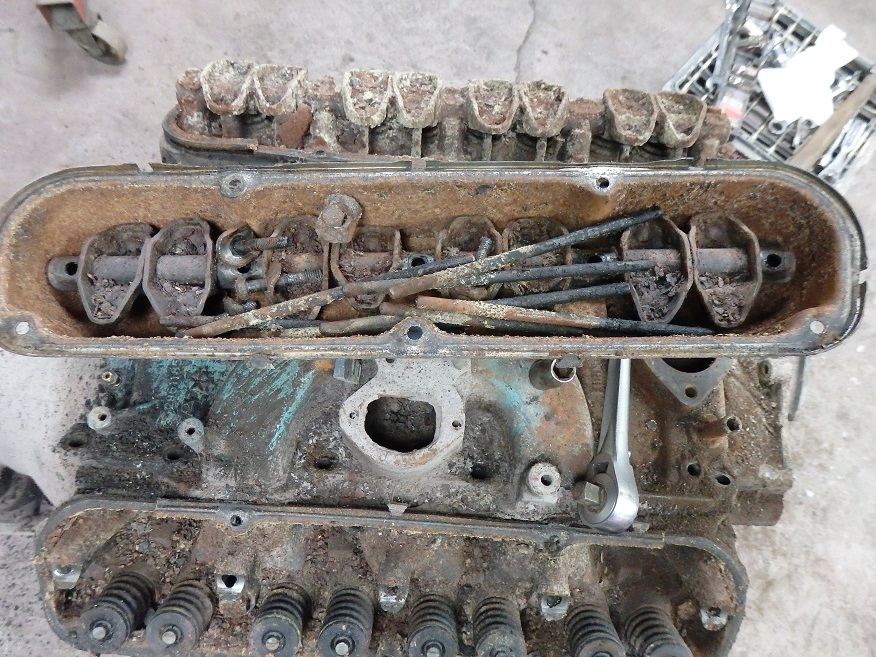 302) There was quite the mess when I removed the valve covers. This is what an engine looks like that has been setting for 30 years.
You just don't pour gas down the carb and it starts right up like they show on TV.
302) There was quite the mess when I removed the valve covers. This is what an engine looks like that has been setting for 30 years.
You just don't pour gas down the carb and it starts right up like they show on TV. My first surprise taking the engine apart was that most of the pushrods were bent. The engine must have run like crap! |
 303) When the intake was pulled I found that the center coolant ports on the heads were plugged solid. I wonder how long the car was in use
with this happening?
303) When the intake was pulled I found that the center coolant ports on the heads were plugged solid. I wonder how long the car was in use
with this happening? |
 304) When an engine is just setting changes are that one or more valves (intake and/or exhaust) is open to atmosphere, which creates the opertunity
for moisture to make it into the cylinders. In this case it looks like perhaps some water made it into the carb and wrecked the #7
cylinder. This motor would not turnover and I'm glad I never tried to start it. The pistons were so stuck in this engine that I had to
remove the crank first and pound the pistons out with a hammer and a block of wood.
304) When an engine is just setting changes are that one or more valves (intake and/or exhaust) is open to atmosphere, which creates the opertunity
for moisture to make it into the cylinders. In this case it looks like perhaps some water made it into the carb and wrecked the #7
cylinder. This motor would not turnover and I'm glad I never tried to start it. The pistons were so stuck in this engine that I had to
remove the crank first and pound the pistons out with a hammer and a block of wood. |
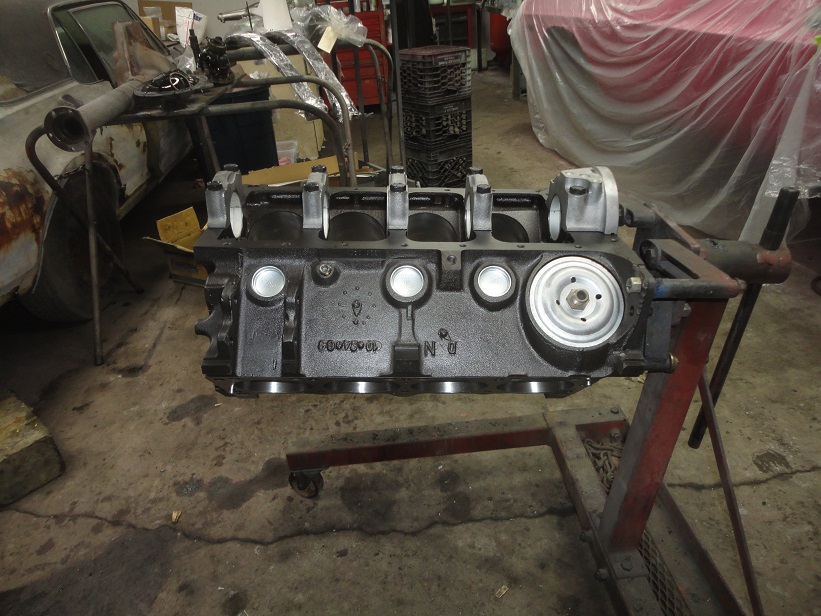
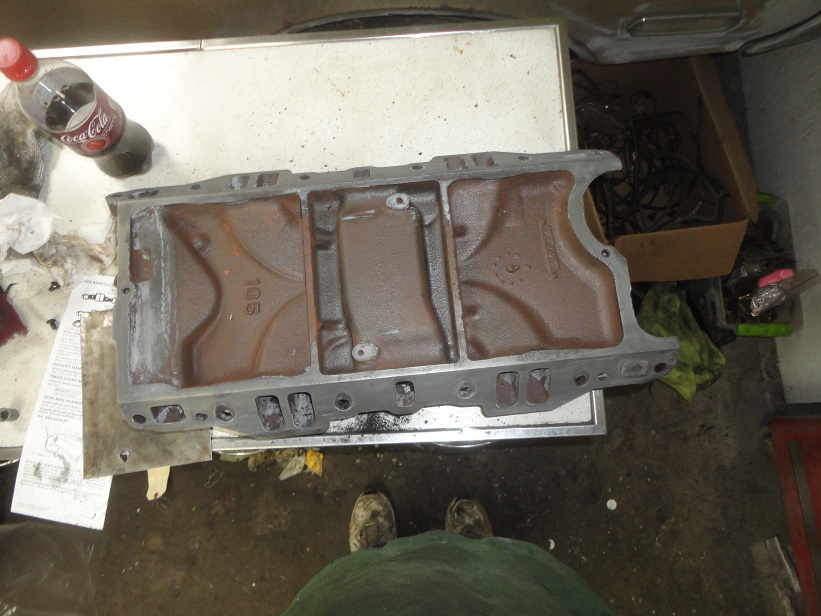
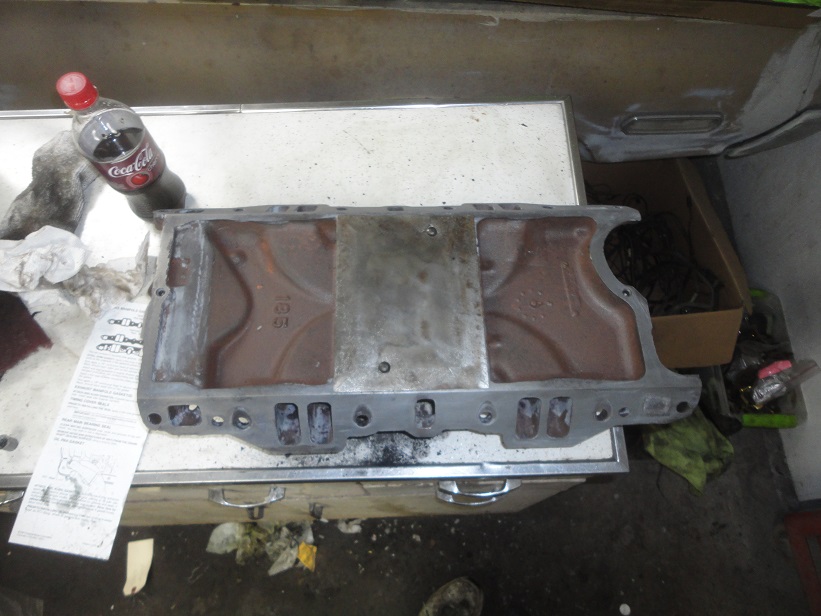
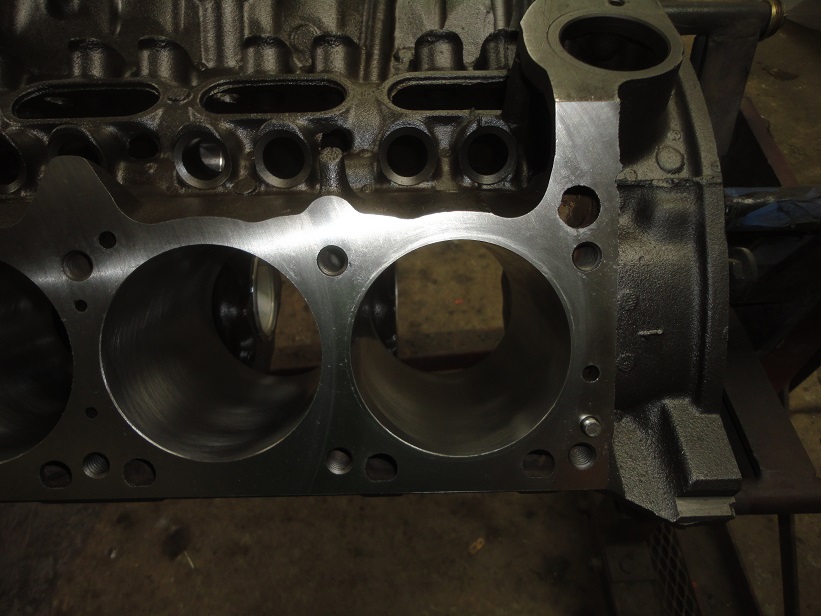 305) Here's the block back from the machine shop (Vermont Engine Service, Williston, VT). It was hot tanked, bored out 0.040", received new cam bearings and new frost plugs.
I had to have the #7 cylinder resleeved due to a very deep rust pit. Amongst other things I had it pressure checked just to make sure that the removable frost
plug wasn't installed for something more ominous. No leaks were found.
305) Here's the block back from the machine shop (Vermont Engine Service, Williston, VT). It was hot tanked, bored out 0.040", received new cam bearings and new frost plugs.
I had to have the #7 cylinder resleeved due to a very deep rust pit. Amongst other things I had it pressure checked just to make sure that the removable frost
plug wasn't installed for something more ominous. No leaks were found.In the first picture you can see that the block casting date is 10/24/1969. Which is curious since the car was built on 2/24/1970. The partial VIN stamped on the block matches the VIN of the car so I know that it's original. In the second picture you can make out that the #7 cylinder was resleeved. |
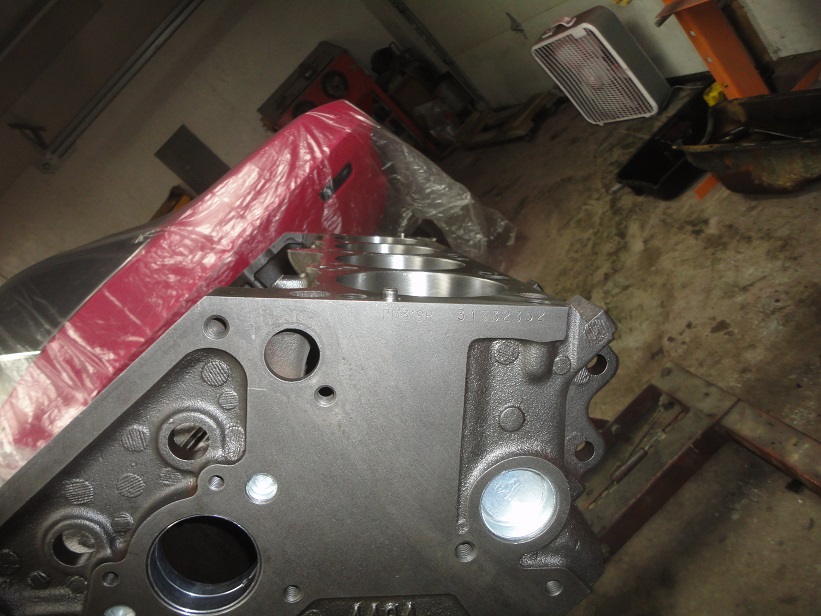 306) Here on the left front of the block is stamped "PM318R 31332352". This translates to: PM = Mound Engine Plant, 318 = displacement, R = Regular Fuel,
3133 = Feb 24, 1970 final assembly date, 2352 = 2352nd engine built.
306) Here on the left front of the block is stamped "PM318R 31332352". This translates to: PM = Mound Engine Plant, 318 = displacement, R = Regular Fuel,
3133 = Feb 24, 1970 final assembly date, 2352 = 2352nd engine built. |
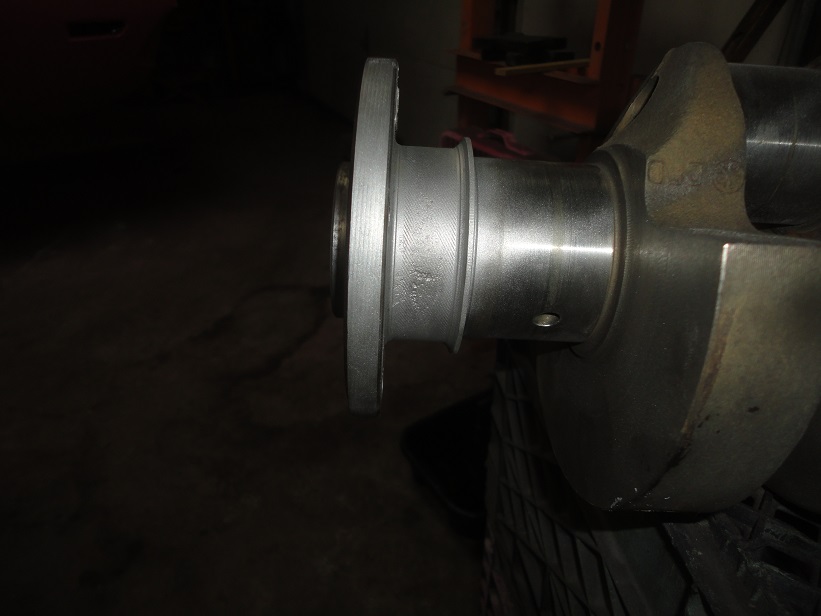 307) The crank was a big surprise. I got a call from the machine shop telling me the crank wasn't any good. There was some deep rust pitting by the rear main seal that
couldn't be fixed. I had to find another one....
307) The crank was a big surprise. I got a call from the machine shop telling me the crank wasn't any good. There was some deep rust pitting by the rear main seal that
couldn't be fixed. I had to find another one.... |
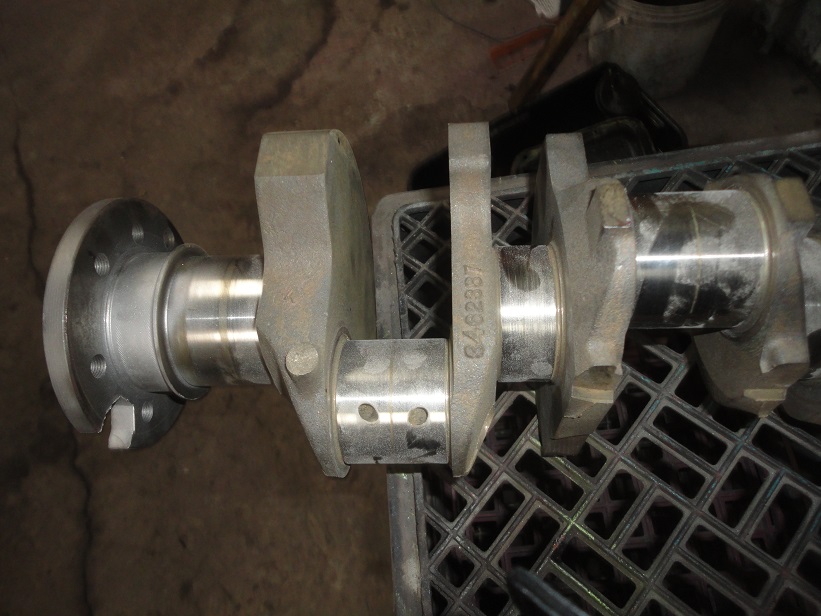
 308) Another big surprise was that the crank was the wrong one for the engine! It was a cast iron heavy duty 3462387 with a casting date of "49"; 4th day of 1969 ?
or 4th day of 1979? What the heck ? This engine had seen some work!
308) Another big surprise was that the crank was the wrong one for the engine! It was a cast iron heavy duty 3462387 with a casting date of "49"; 4th day of 1969 ?
or 4th day of 1979? What the heck ? This engine had seen some work! |

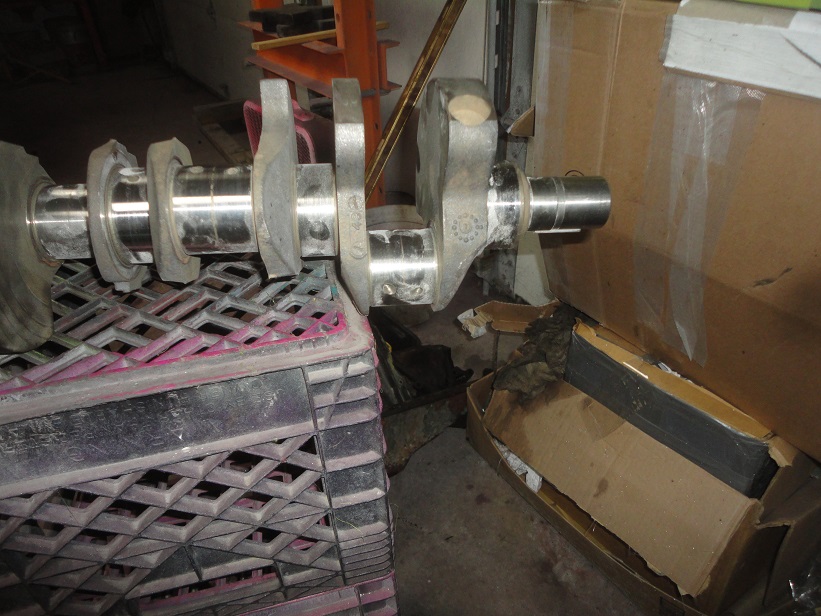
 309) Well, appearantly 318 cranks DO grow on trees. I was able to find the correct 2658393 crank from Don at www.wolfiescars.com for $165 and he had it magnafluxed before
he sold it to me.
309) Well, appearantly 318 cranks DO grow on trees. I was able to find the correct 2658393 crank from Don at www.wolfiescars.com for $165 and he had it magnafluxed before
he sold it to me. Vermont Engine turned it 0.010" and then balanced it. The finished crank is in the picture on the right. |

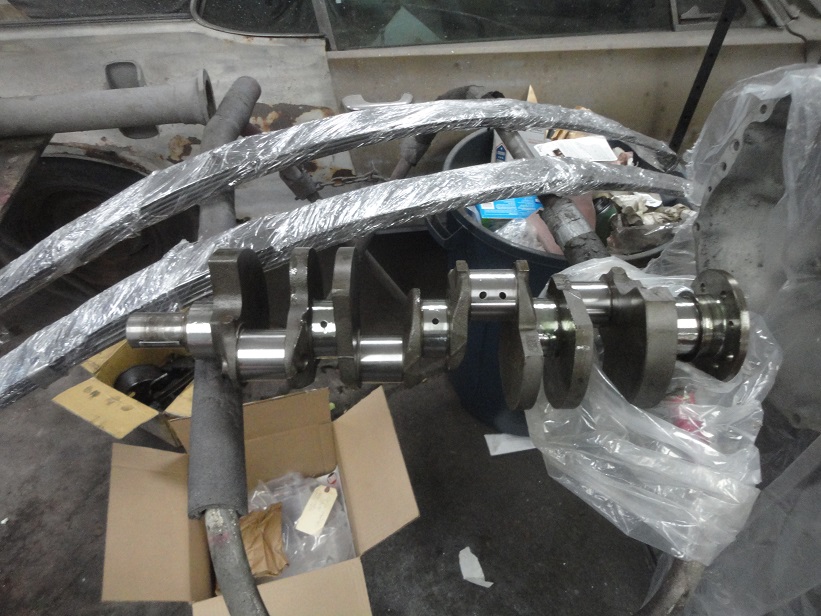
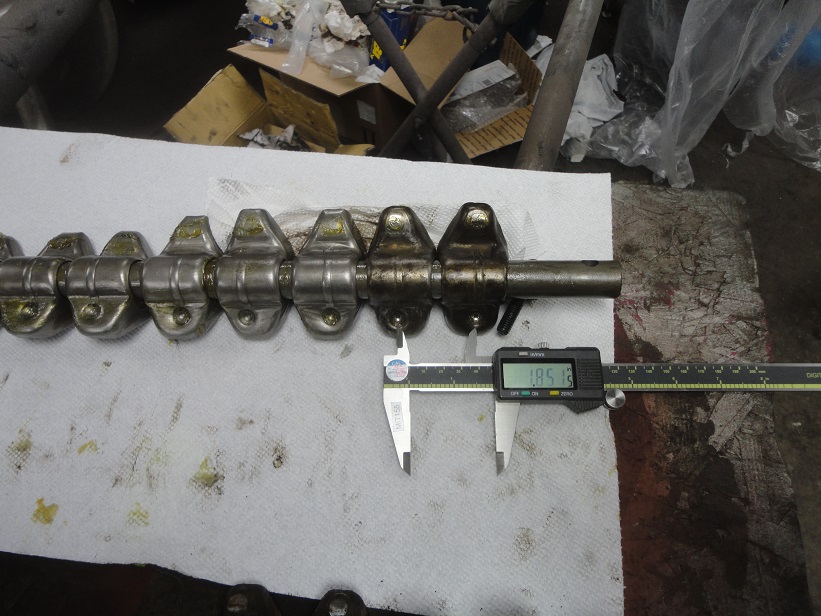
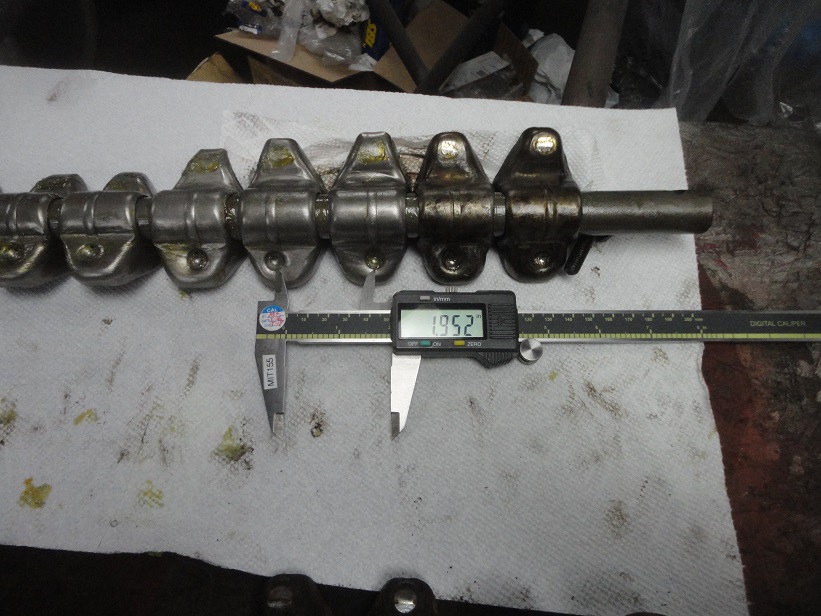
 310) In these pictures of the new crank you can see the correct part number 2658393 and its casting date of 1532 (153nd day of 1972).
 |
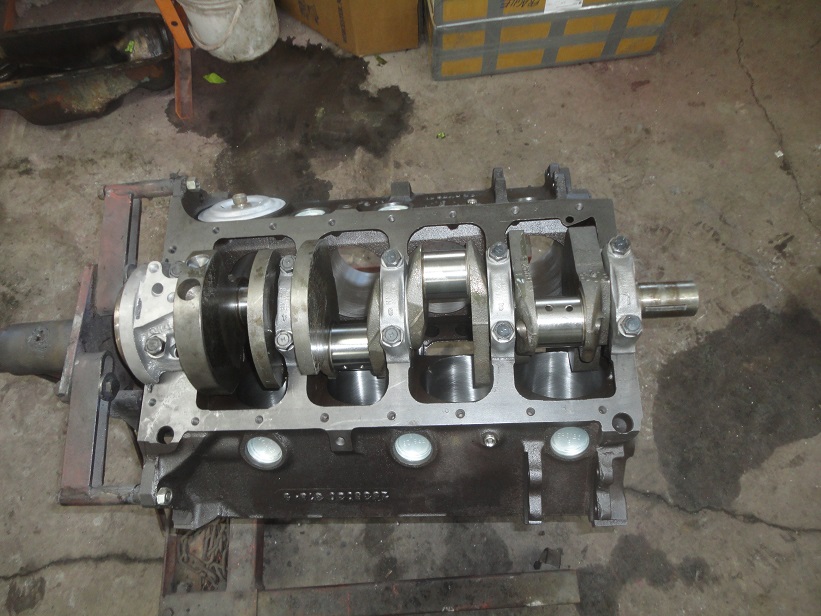 311) Here it is in its new home. Normally I would check the clearance on it, but the machine shop had done this for me.
 |
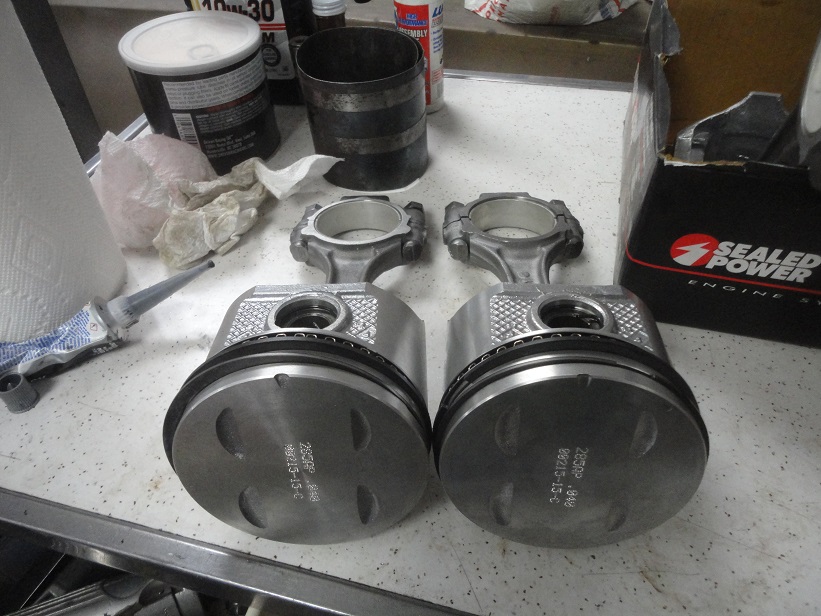
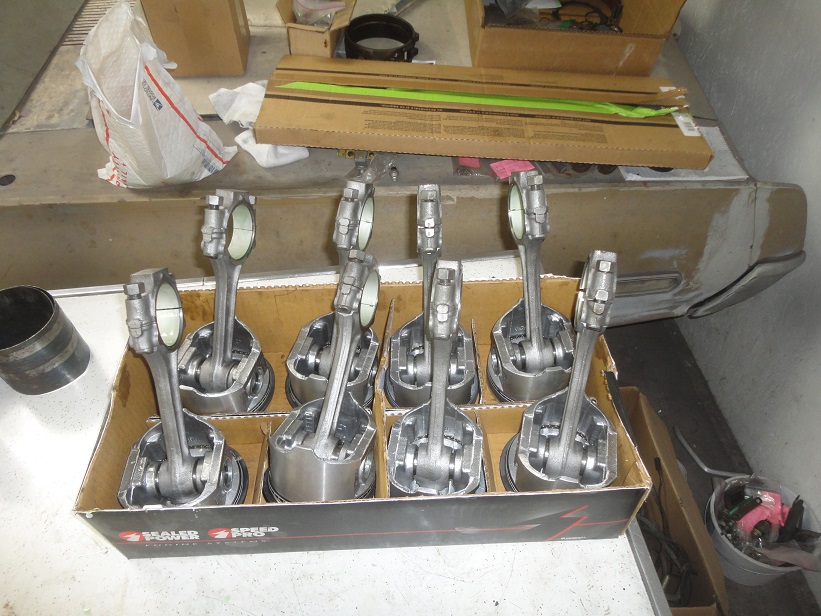 312) Here are the new 0.040" oversized pistons all ringed-up and ready to be installed.
 |
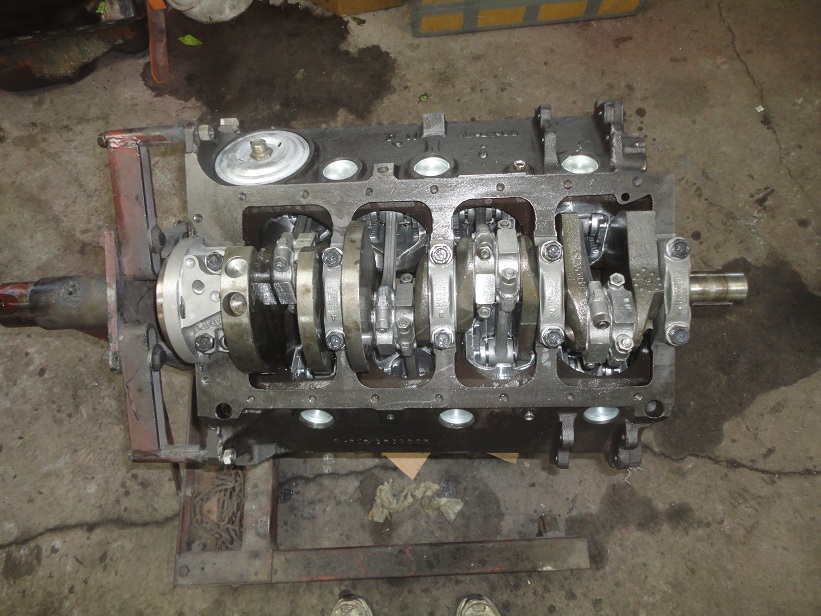 313) With the pistons installed and the crank turning over easily, it's time for the cam install. Note: Contrary to what some people might think the 318 did not
come with a 90 degree oil filter adaptor. That was for the performance engines so that the oil filter would clear the exhaust.
313) With the pistons installed and the crank turning over easily, it's time for the cam install. Note: Contrary to what some people might think the 318 did not
come with a 90 degree oil filter adaptor. That was for the performance engines so that the oil filter would clear the exhaust. |
 314) With the pistons installed the cam lobes were fully loaded with Joe Gibbs Engine Assembly Grease. Make sure you use a good break in grease or your lifters will
wear down in minutes.
314) With the pistons installed the cam lobes were fully loaded with Joe Gibbs Engine Assembly Grease. Make sure you use a good break in grease or your lifters will
wear down in minutes. |
 315) A plate covers the end of the cam. There is a special copper plated bolt with a hole in it that allows oil to drain from the top
of the block to the timing chain. Care should be taken to put the bolt in the correct location.
315) A plate covers the end of the cam. There is a special copper plated bolt with a hole in it that allows oil to drain from the top
of the block to the timing chain. Care should be taken to put the bolt in the correct location. |
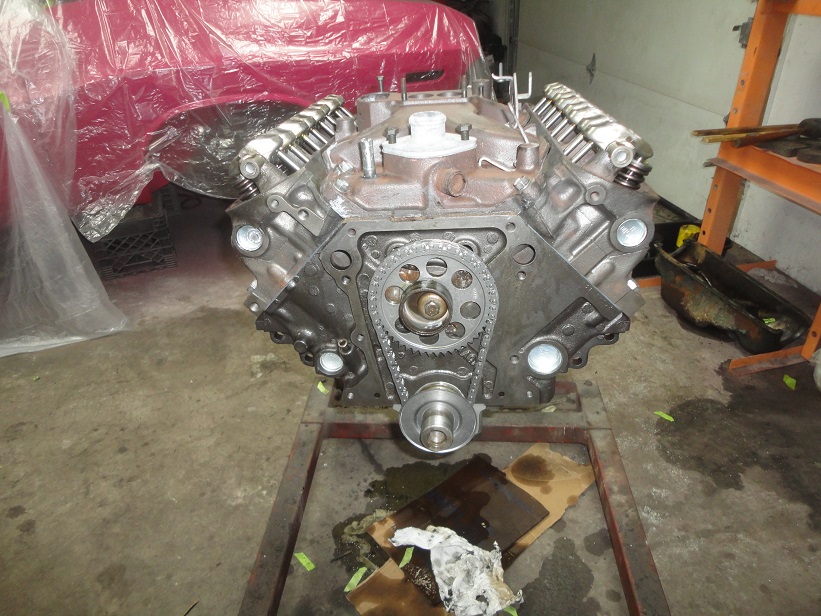
 316) Next to go on was the timing chain and gear. Just make sure the dots are pointing at each other and are aligned with the centerline of the block.
This is also the location of 0 degree timing with #1 cylinder at TDC. When you keep things at 0 degrees the fuel pump will drop right in without a problem
and when you drop in your distributor, make sure that you are pointing at plug wire number 1. Thous should set the timing closed enough to start it.
316) Next to go on was the timing chain and gear. Just make sure the dots are pointing at each other and are aligned with the centerline of the block.
This is also the location of 0 degree timing with #1 cylinder at TDC. When you keep things at 0 degrees the fuel pump will drop right in without a problem
and when you drop in your distributor, make sure that you are pointing at plug wire number 1. Thous should set the timing closed enough to start it. |
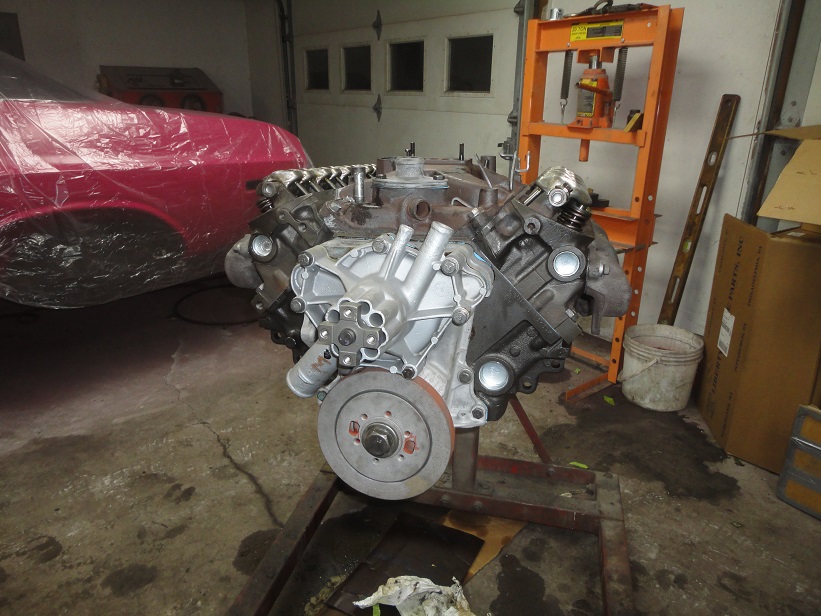
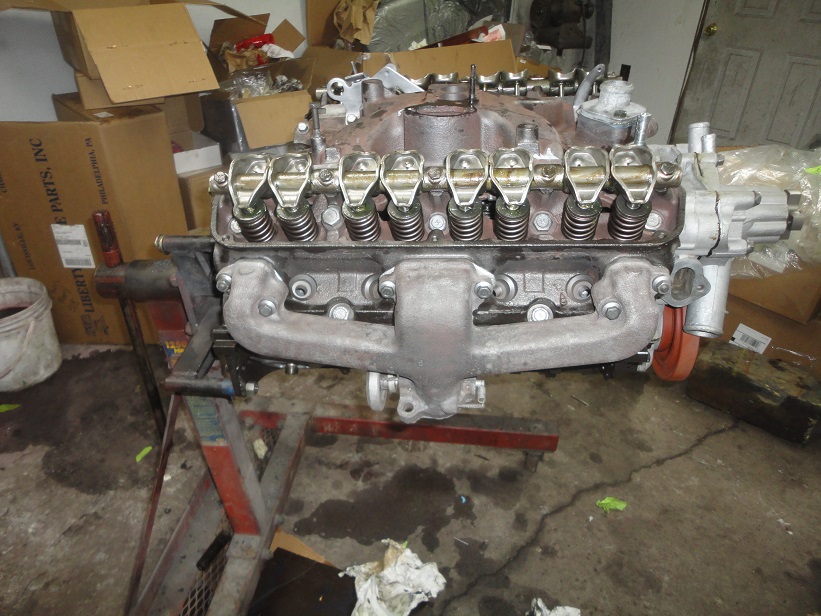
 317) Next to go on are the heads. Notice the nice cleaned out coolant ports.
 |
 318) The intake was hot tanked with the baffle plate removed. The baffle is there to keep engine oil from splashing
off from the underside of the manifold and burning (or so they say).
318) The intake was hot tanked with the baffle plate removed. The baffle is there to keep engine oil from splashing
off from the underside of the manifold and burning (or so they say). |
 319) Here's the intake all installed. The accelerator cable and spring brackets are installed with the intake.
 Also, shown in the picture is the oil slinger, which must be installed before the timing cover. When I took the engine a part I found that it was missing. A lot of surprises on the inside of this one. |
 320) The next to go on is the timing cover and the water pump. With the water pump I wanted the original looking pump installed, but the one that was on it was not original.
There are new pumps out there, but they don't have the 10-holed snoat design like the originals. A1 Cardone remanufactures original ones, so I bought one of them, which you
see installed on this picture. The problem with this one, was that the upper ports look like they were ground down and possibly repaired. So what I did was to buy 3 more waterpumps
at $25 each and was lucky to get a real nice one and install it (refer to later pictures). The only differences between the one I used and the original one was that the remanufactured
one had a round hub (for the fan) and single rib reenforcements (vs dual) by the upper water ports. However, none if that will be visible once everything is bolted to the front of
the engine.
320) The next to go on is the timing cover and the water pump. With the water pump I wanted the original looking pump installed, but the one that was on it was not original.
There are new pumps out there, but they don't have the 10-holed snoat design like the originals. A1 Cardone remanufactures original ones, so I bought one of them, which you
see installed on this picture. The problem with this one, was that the upper ports look like they were ground down and possibly repaired. So what I did was to buy 3 more waterpumps
at $25 each and was lucky to get a real nice one and install it (refer to later pictures). The only differences between the one I used and the original one was that the remanufactured
one had a round hub (for the fan) and single rib reenforcements (vs dual) by the upper water ports. However, none if that will be visible once everything is bolted to the front of
the engine. |
 321) More surprises were on the way. As stated previously, the pushrods were bent. So I had to get new ones. Original pushrods
for 318's are 5/32 (0.156") diameter. They don't make new ones them that small. They only make 3/16 (0.187") diameter ones. The new ones are also a little longer, which is OK since the new ones have rounded
ends and the original ones are flattened at the tips.
321) More surprises were on the way. As stated previously, the pushrods were bent. So I had to get new ones. Original pushrods
for 318's are 5/32 (0.156") diameter. They don't make new ones them that small. They only make 3/16 (0.187") diameter ones. The new ones are also a little longer, which is OK since the new ones have rounded
ends and the original ones are flattened at the tips. The next surprise came when the I installed new SBI rocker arms and the 3/16 pushrods. The cups in the rocker arms were 0.100" further apart then the originals (which had to be replaced). This caused the fatter pushrods to rub against the guide holes in the heads. So I returned the SBI rocker arms and bought the more expensive Sealed Power ones and my problems went away. |
|
322) One final thing I learned was that modern oils have very low zinc content, which is not good for breaking in engines. Care must be taken to use high zinc oils for engine break-in. From what I have
been shown, lifters will wear excessivly rather quickly if you don't use high zinc oils. |
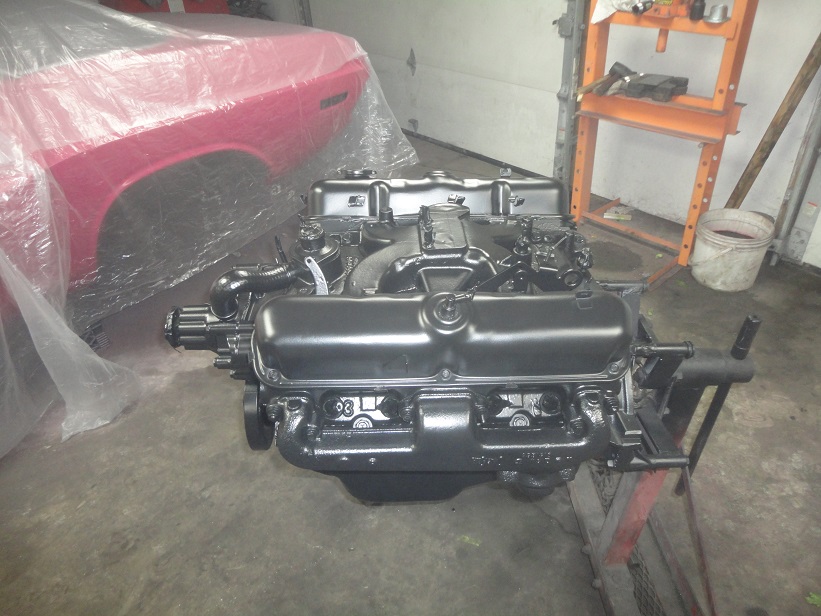
 323) The last things I needed to do before painting was install the valve covers and switch the water pump. The bypass hose, which uses spring clamps, is installed prior to paint. Unlike the B/RB engines, the small
blocks (318's/340's) did not have the fuel pump, battery ground cable or exhaust heat shield installed prior to paint, at least in 1970. Items that were installed are the valve cover grommets, PCV, spark plugs, oil pressure sending unit and
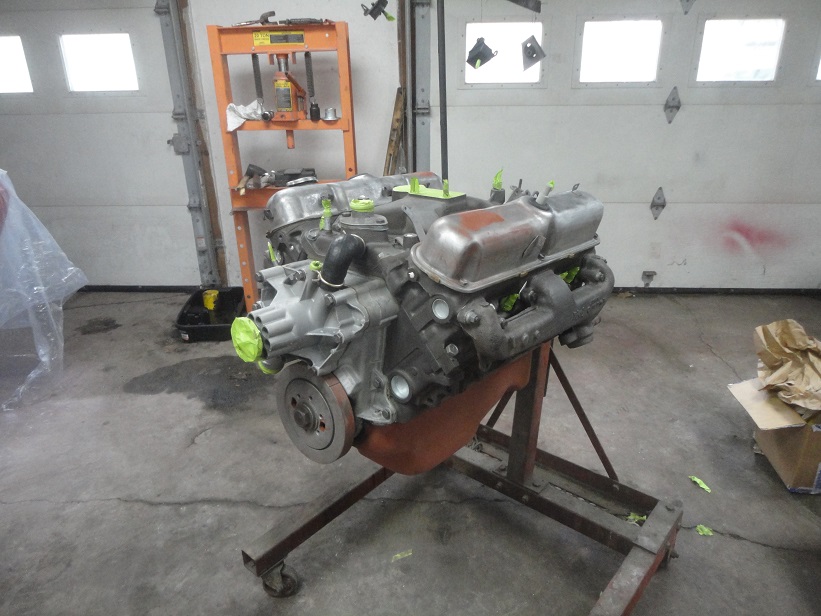
exhasut manifolds. Basically what you see in this picture is what is supposed to be installed prior to paint.
323) The last things I needed to do before painting was install the valve covers and switch the water pump. The bypass hose, which uses spring clamps, is installed prior to paint. Unlike the B/RB engines, the small
blocks (318's/340's) did not have the fuel pump, battery ground cable or exhaust heat shield installed prior to paint, at least in 1970. Items that were installed are the valve cover grommets, PCV, spark plugs, oil pressure sending unit and
exhasut manifolds. Basically what you see in this picture is what is supposed to be installed prior to paint. |
 324) The adventure would not be complete without something else going wrong. The original color on the 1970-74 318's was Chrysler P4349217. Mopar Performance makes in a rattle can paint P4349217AB. It is supposed to be the same color.
Well it isn't! At least not the 3 cans I bought.
324) The adventure would not be complete without something else going wrong. The original color on the 1970-74 318's was Chrysler P4349217. Mopar Performance makes in a rattle can paint P4349217AB. It is supposed to be the same color.
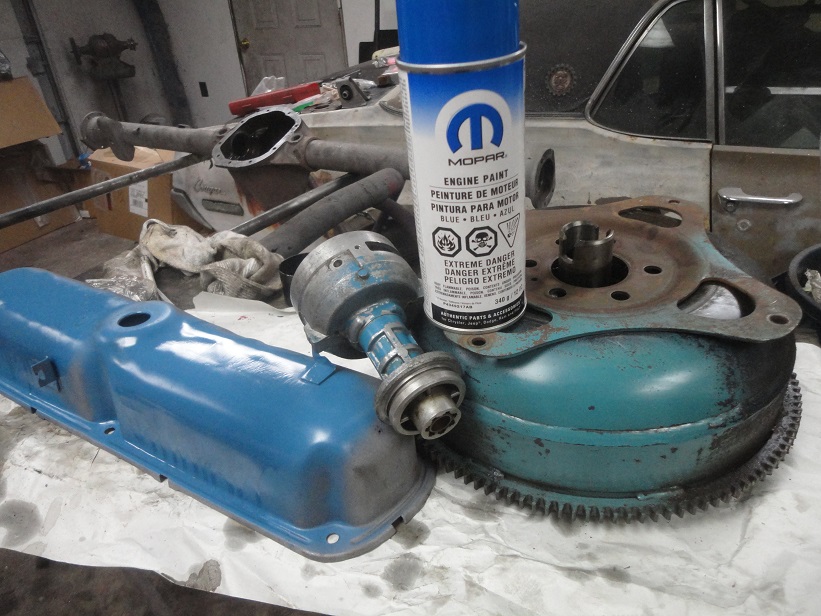
Well it isn't! At least not the 3 cans I bought. In this picture is the original torque converter & flywheel, a used distributor housing from a later 318, and a valve cover that I painted with the Mopar Performance paint. Can you guess which is the correct color? The distributor! Why is the torque converter & flywheel the wrong color you may ask ? So it turns out that Chrysler switched over to using corporate blue, instead of turquiose for the 1970 model year. The early Chrysler blue paint turned turquiose due to the heat. |
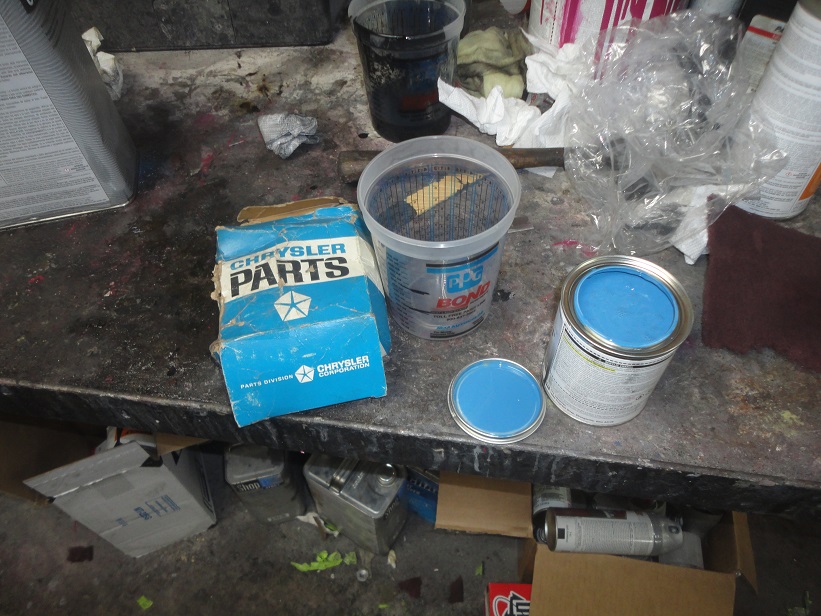 325) Roger Gibson Restorations sells their own proprietory mix of the correct blue, mixed in PPG Shopline enamel. They charge $65 for a pint, which is more than enough to paint
an engine.
325) Roger Gibson Restorations sells their own proprietory mix of the correct blue, mixed in PPG Shopline enamel. They charge $65 for a pint, which is more than enough to paint
an engine. |
 326) Before painting the engine I had a lot of prep work to do. I washed it down with thinner to remove the oils. I then used metal prep to take off any surface rust that formed since the intake was stripped. I also had to dust the intake with sandblast to clean out some pockets
that the metal prep didn't clean up. Don't worry the engine was masked and covered for the sandblasting. I then blew it off and washed it down with wax & grease remover. Once dried I gave it two coats of DP90LF epoxy primer.
326) Before painting the engine I had a lot of prep work to do. I washed it down with thinner to remove the oils. I then used metal prep to take off any surface rust that formed since the intake was stripped. I also had to dust the intake with sandblast to clean out some pockets
that the metal prep didn't clean up. Don't worry the engine was masked and covered for the sandblasting. I then blew it off and washed it down with wax & grease remover. Once dried I gave it two coats of DP90LF epoxy primer. |
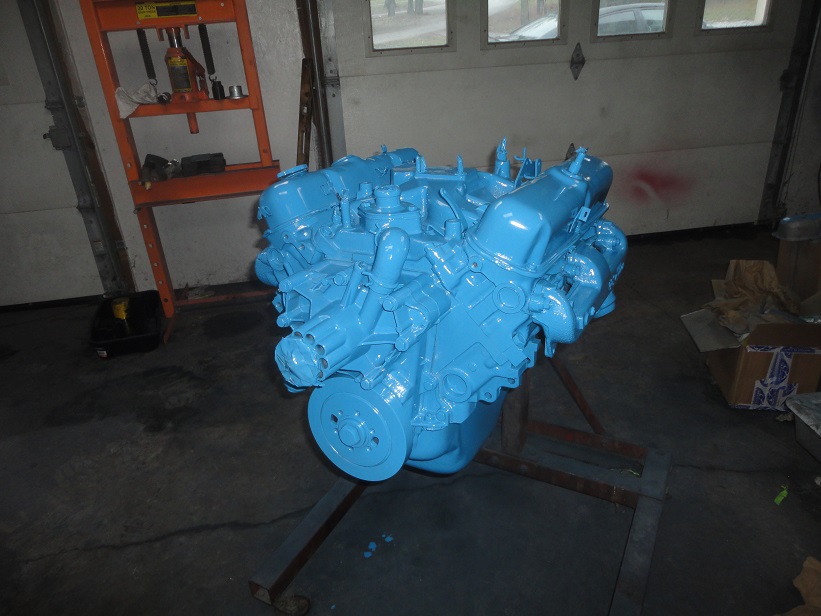 327) Here it is three coats later. Oooh, so blue.
 |
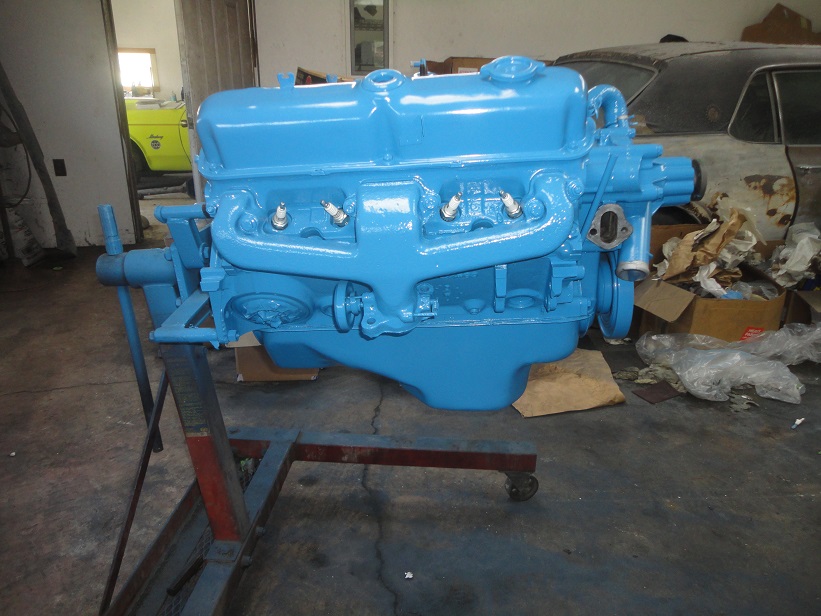
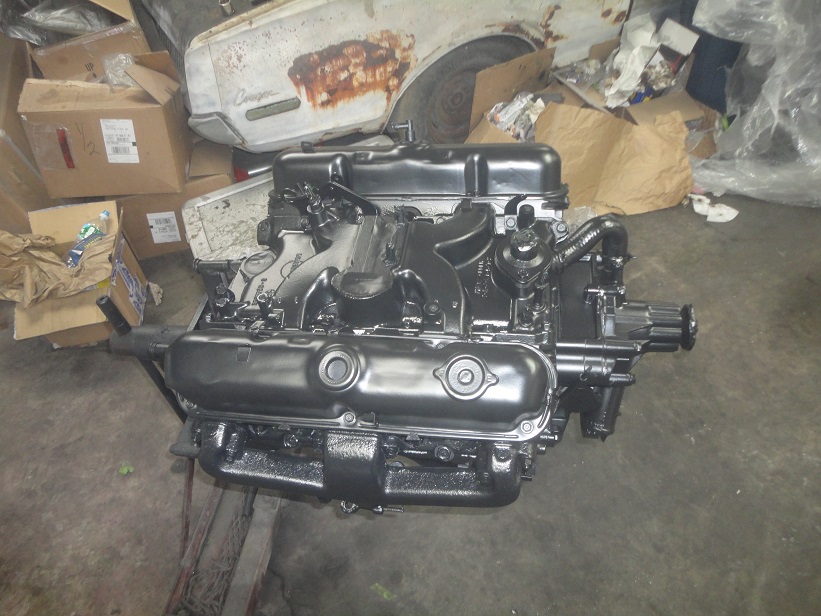
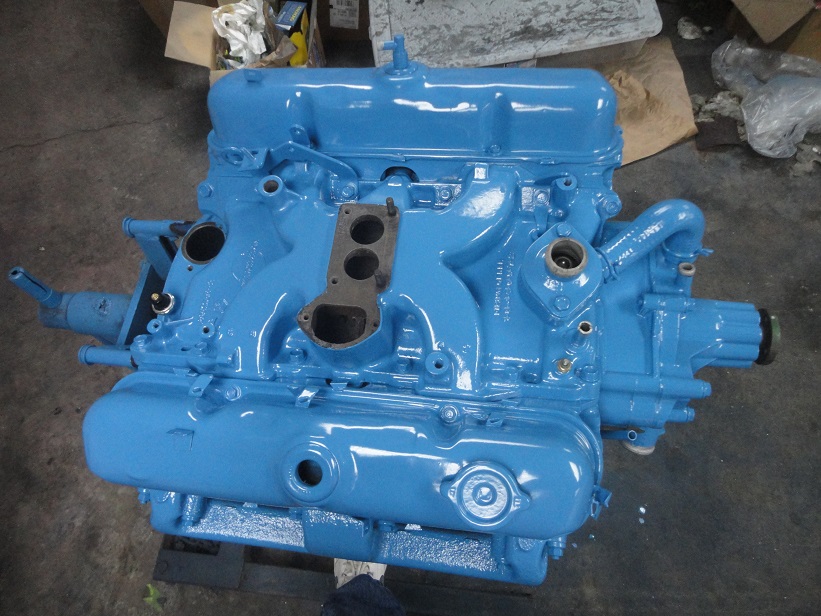 328) And finally it was unmasked and ready for the transmission.
 |